Create a WebSocket API
Overview
A WebSocket API is a streaming API in MWARE ESB that is implemented based on the WebSocket protocol specification, which is compatible with HTTP. The WebSocket protocol supports full-duplex communication over a channel that is established once. Therefore, WebSocket protocols allow a continuous two-way communication between the server and the client.
You can create a WebSocket API from scratch in MWARE ESB and export the WebSocket APIs that are created within MWARE ESB as AsyncAPI definitions. Alternatively, you can also import existing AsyncAPI definitions to create SSE APIs in MWARE ESB.
This section guides you through the process of creating a WebSocket API from scratch in which you can expose a WebSocket backend via MWARE ESB. After the API is created, you will be able to create independent channels to connect to each topic in the API. These topics can be mapped to different channels in the backend. As a result, the user can maintain multiple channels with the API to exchange different types of events simultaneously.
How it works
The WebSocket server can send messages to the WebSocket client, or vice-versa, or both. This is useful in use cases based on the Event Driven Architecture (EDA), where events are sent to be consumed in an asynchronous manner and paving the way for an immediate user experience.
Note
When you create a WebSocket Streaming API it's exposed via both ws and wss protocols. By default, the ws transport uses port 9099, and the wss transport uses port 8099.
Example usage
For example, chat room applications use WebSocket API so that messages can be sent in a bi-directional manner from the server to the client and vise versa.
Basic flow
Follow the instructions below to create a WebSocket API using the basic flow:
Step 1 - Design a WebSocket API
Defining port offset
If you apply a port offset to MWARE ESB, the Developer Portal UI will not get updated automatically.
Add the following configuration to explicitly configure port offset
- Navigate to the
deployment.tomlfile. Add the following configuration.
 [[apim.gateway.environment]]
 ws_endpoint = "ws://localhost:9190"
In the above configuration, the offset is
100.9190was obtained by adding100to the default port9090.
-
Sign in to the Publisher.
https://<hostname>:9443/publisherFor testing purposes, you can use
https://localhost:9443/publisherandadminas the username and password. -
Click Create API, go to Streaming API, and Click WebSocket API.
Note
The Create button will only appear for a user who has the
creatorrole permission. -
Enter the API details.
Field Sample value Name WebSocket Context /websocketThe API context is used by the Gateway to identify the API. Therefore, the API context must be unique. This context is the API's root context when invoking the API through the Gateway.
You can define the API's version as a parameter of its context by adding the
{version}into the context. For example,{version}/websocket. The MWARE ESB assigns the actual version of the API to the{version}parameter internally. For example,ws://localhost:9099/1.0.0/websocket. Note that the version appears before the context, allowing you to group your APIs based on the versions.Version 1.0.0 Protocol WebSocket
Endpoint Use one of the following endpoints.
- ws://ws.ifelse.io:80
- wss://ws.ifelse.io:443
-
Click Create to create the API.
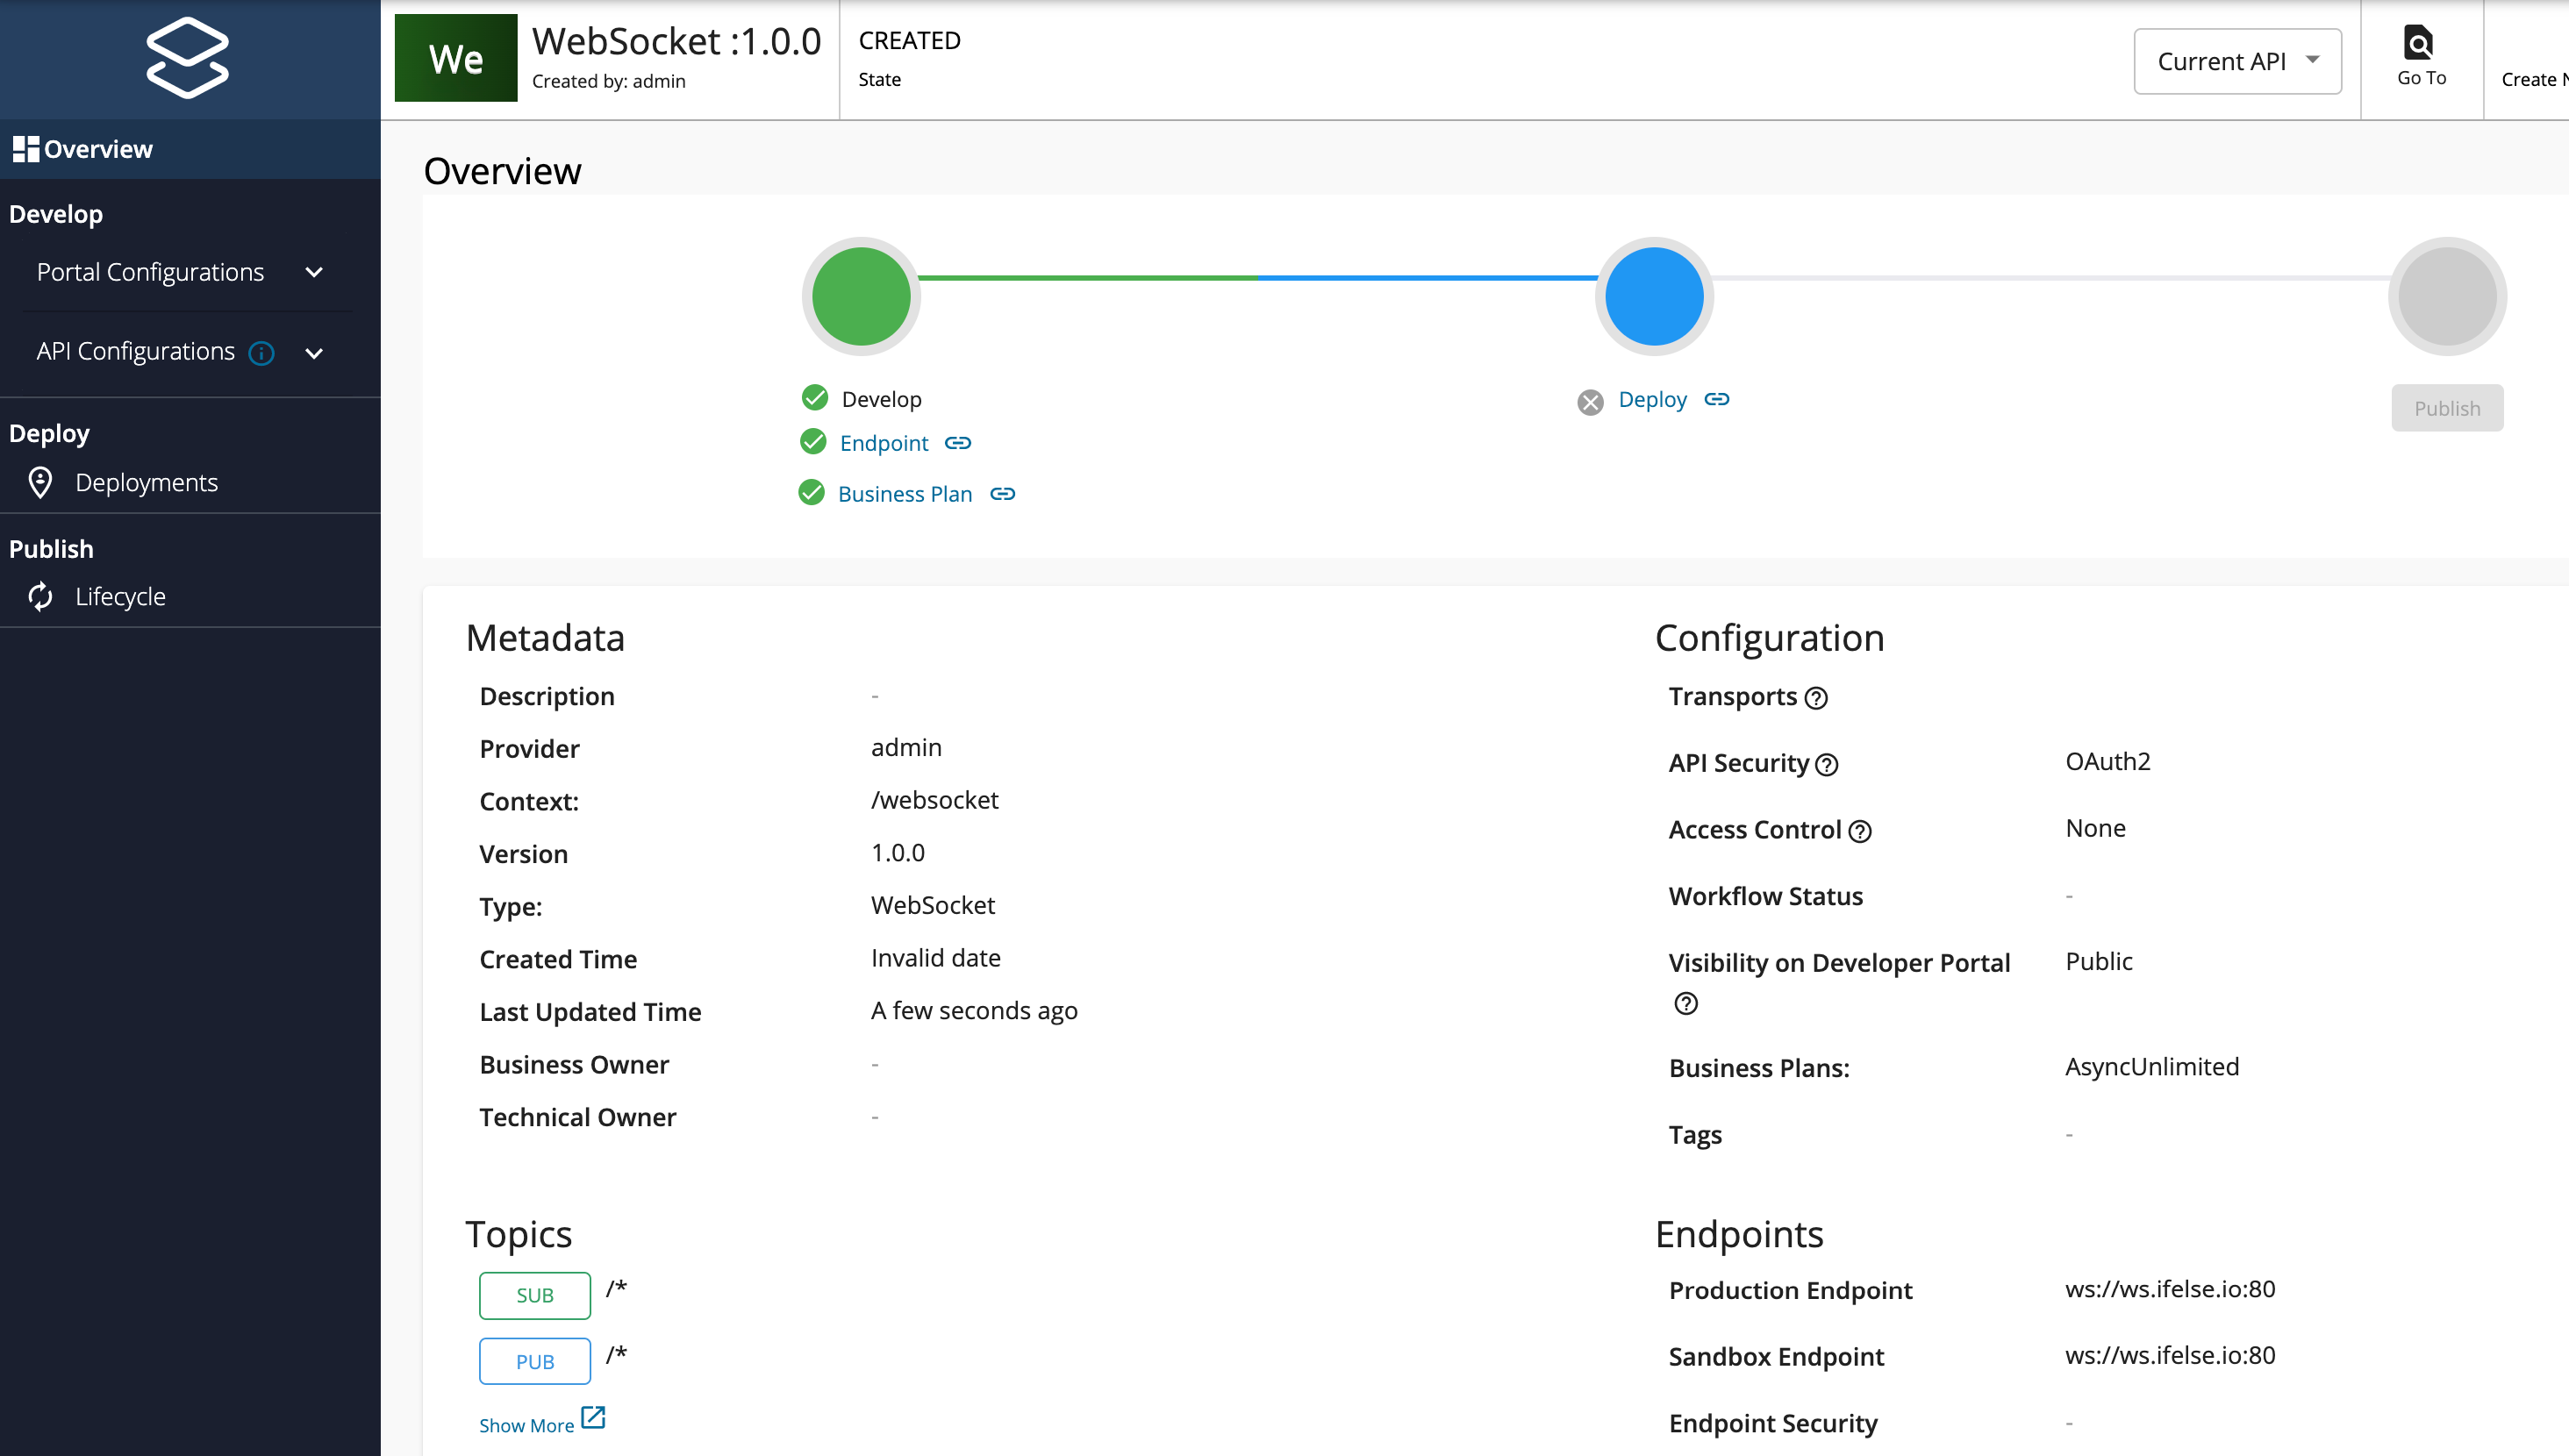
The overview page of the newly created API appears.
Step 2 - Configure the Topics
Topics of a WebSocket API are always Subscribe (sub) and Publish (pub), where the flow of events can be either from the server (backend) to the clients or from the client to the server. By default, the WebSocket API will have a topic with the name /*.
-
Click Topics under API Configurations and navigate to the Topics page.
-
Modify the topics as follows and click Save to update them.
-
Optionally, click delete as shown below, to delete an existing topic.
-
Select the Types, enter the Topic Name, and click + as shown below, to add a new topic.
Topic Name /notificationsThe newly added topic is displayed as follows.
-
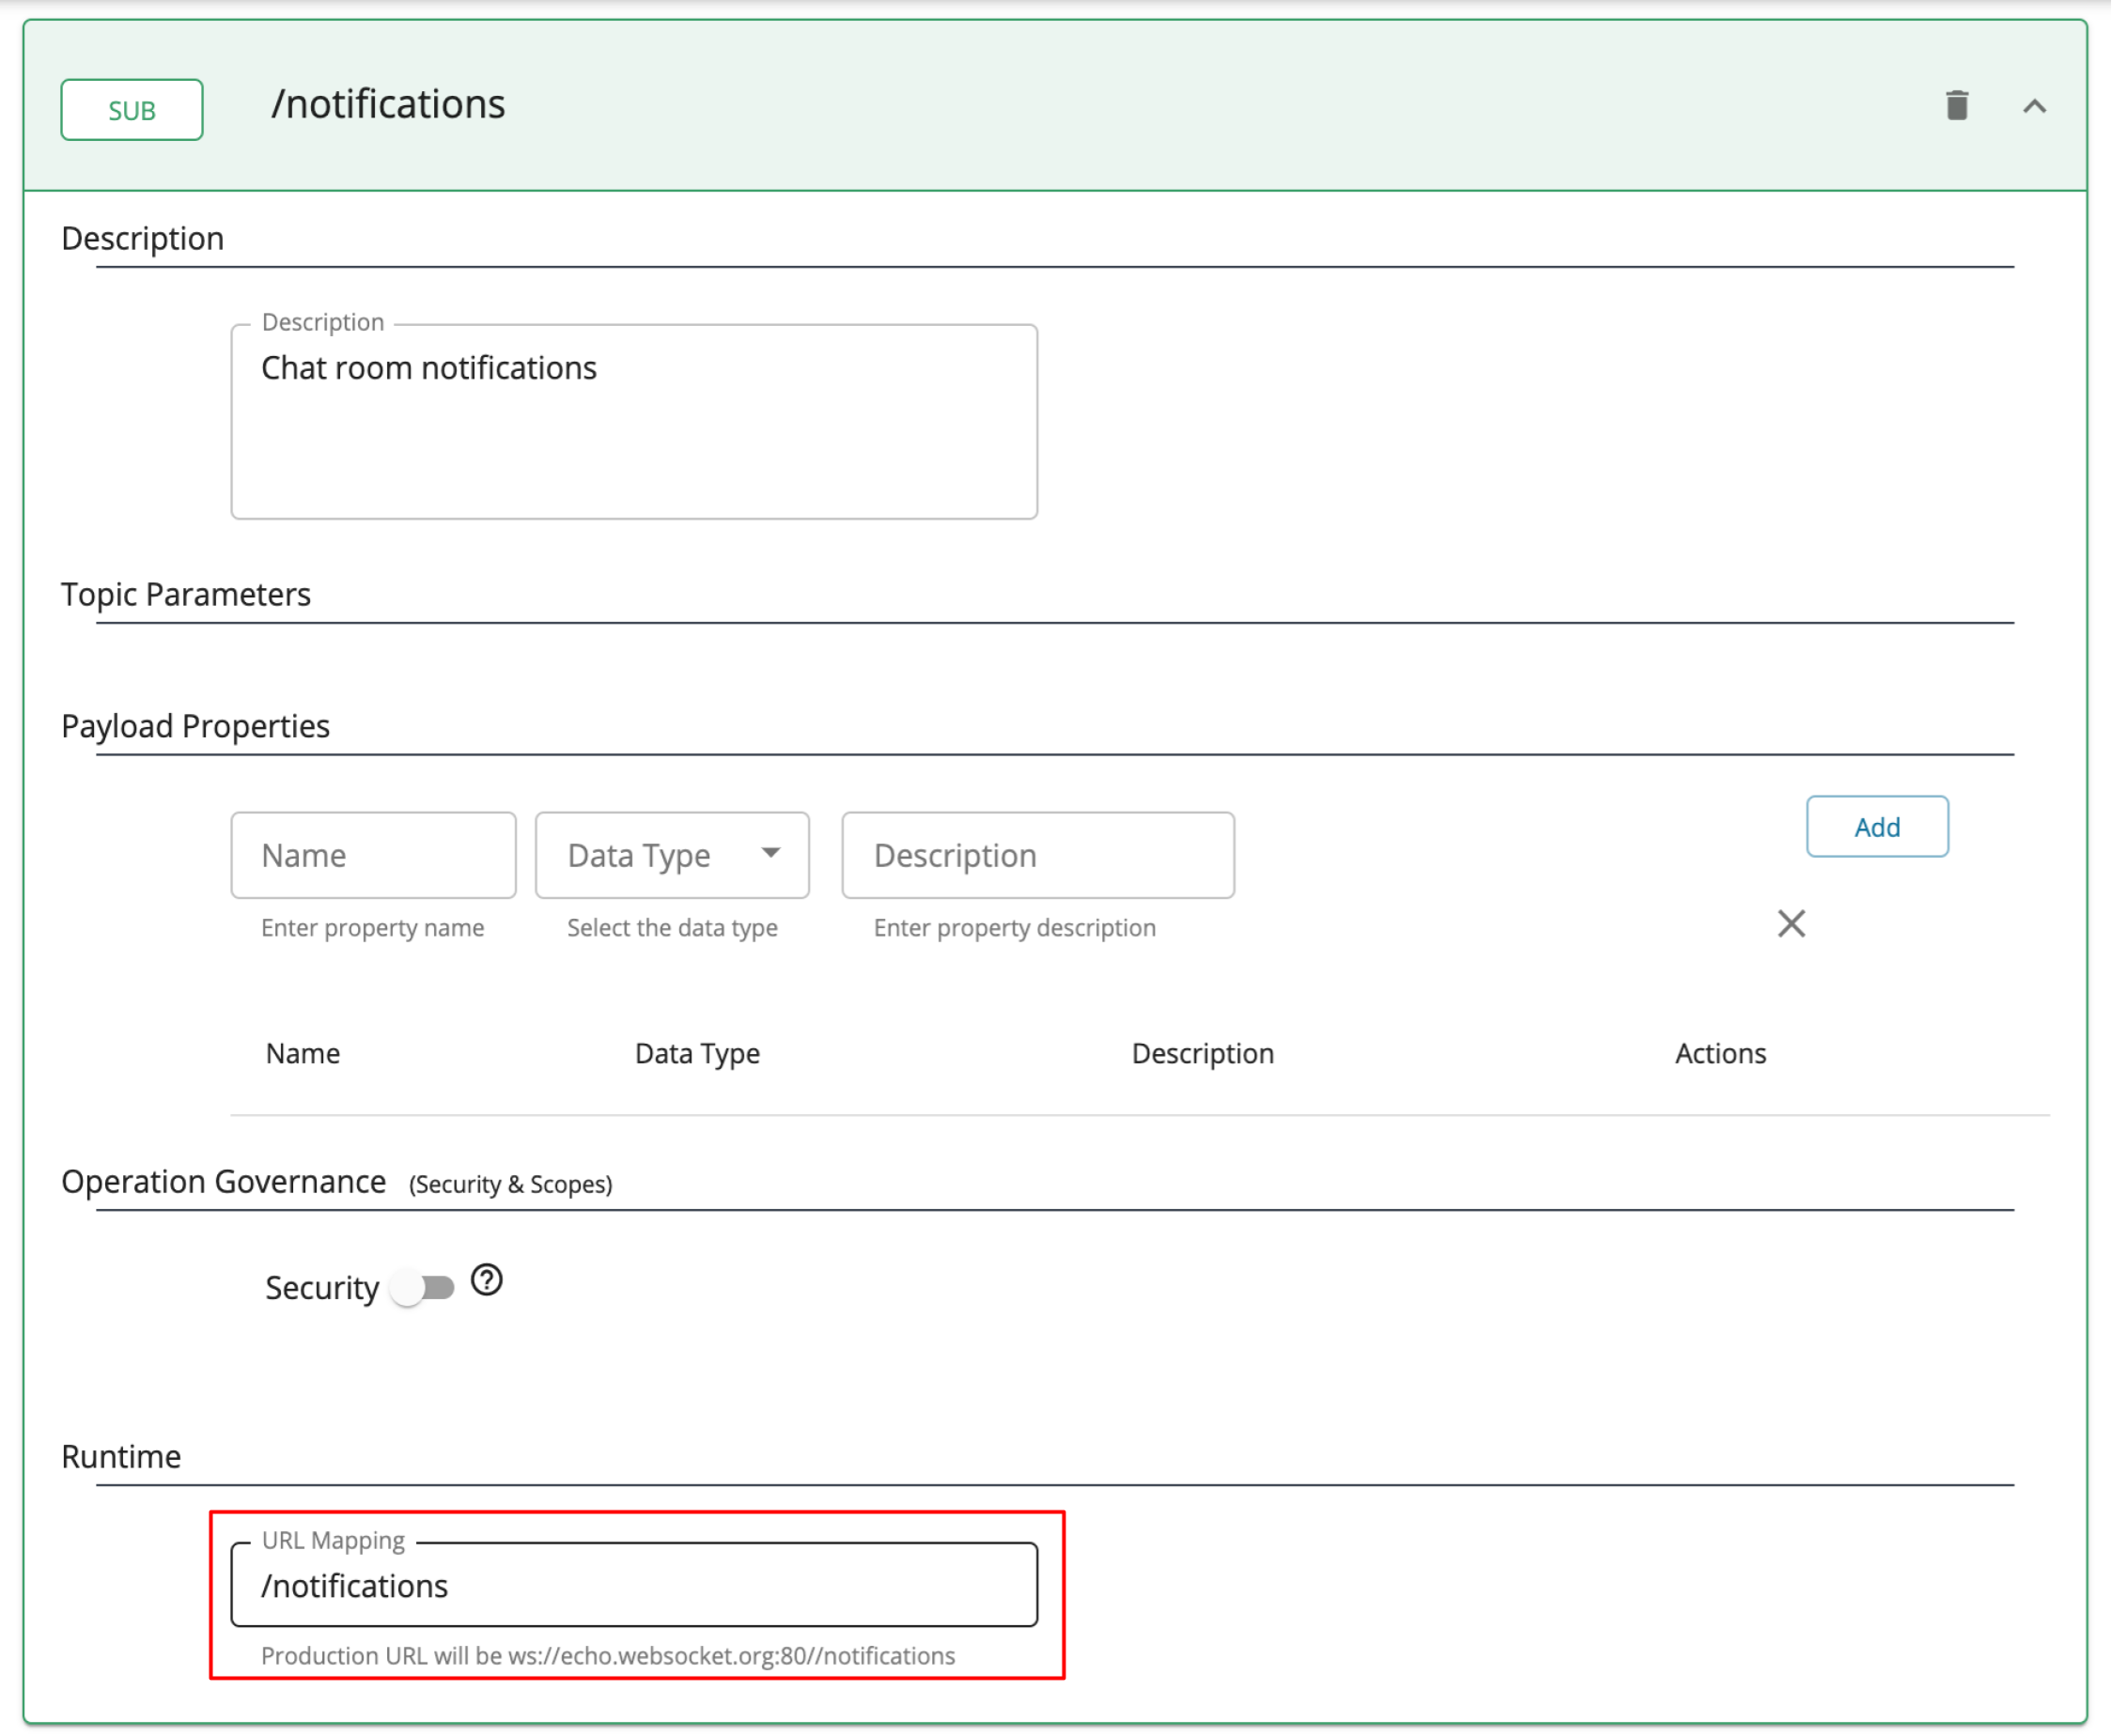
Optionally, provide a URL Mapping to the topic.
The provided URL Mapping will be appended to the WebSocket endpoint URL that you provided when creating the API, and the traffic via this topic will be sent to the resulting URL.
Expand both PUB and SUB under the created topic, provide the same URL Mapping for both and click Save.
Description Chat room notifications URL Mapping /notifications
-
Step 3 - View the AsyncAPI Definition
Click AsyncAPI Definition under API Configurations.
The AsyncAPI definition of the streaming API, which you just created, appears.
Now, you have successfully created and configured a Streaming API. Next, let's Publish your API.
End-to-end tutorial
Learn more by trying out an end-to-end tutorial on Creating and Publishing a WebSocket API, which uses the default Streaming Provider that works with MWARE ESB, namely the ESB Streaming Integrator.
Once you create and publish a WebSocket API, you can also deploy the API you created.
See Also
-
Learn more on the concepts that you need to know when creating a Streaming API:
-
Learn how to test a Streaming API. For an example, see Test a WebSub/WebHook API.


