Setting up the Microsoft Azure Storage Environment
To work with the Microsoft Azure Storage connector, you need to have a Microsoft Azure account. If you do not have a Microsoft Azure account, you are prompted to create one when you sign up.
Signing Up for Microsoft Azure
To sign up for Microsoft Azure:
-
Navigate to Microsoft Azure and create a Microsoft Azure account using Start free button.
-
Follow the online instructions.
Part of the sign-up procedure involves receiving a phone call and entering a verification code using the phone keypad. Microsoft Azure will notify you by email when your account is active and available for you to use.
Create Microsoft Azure Storage account
Follow the steps below to obtain the access credentials from Microsoft Azure Storage account.
-
Go to Microsoft Azure, and sign in to the created Microsoft Azure account. On the Azure portal menu, select All services. In the list of resources, type Storage Accounts. As you begin typing, the list filters based on your input. Select Storage Accounts.
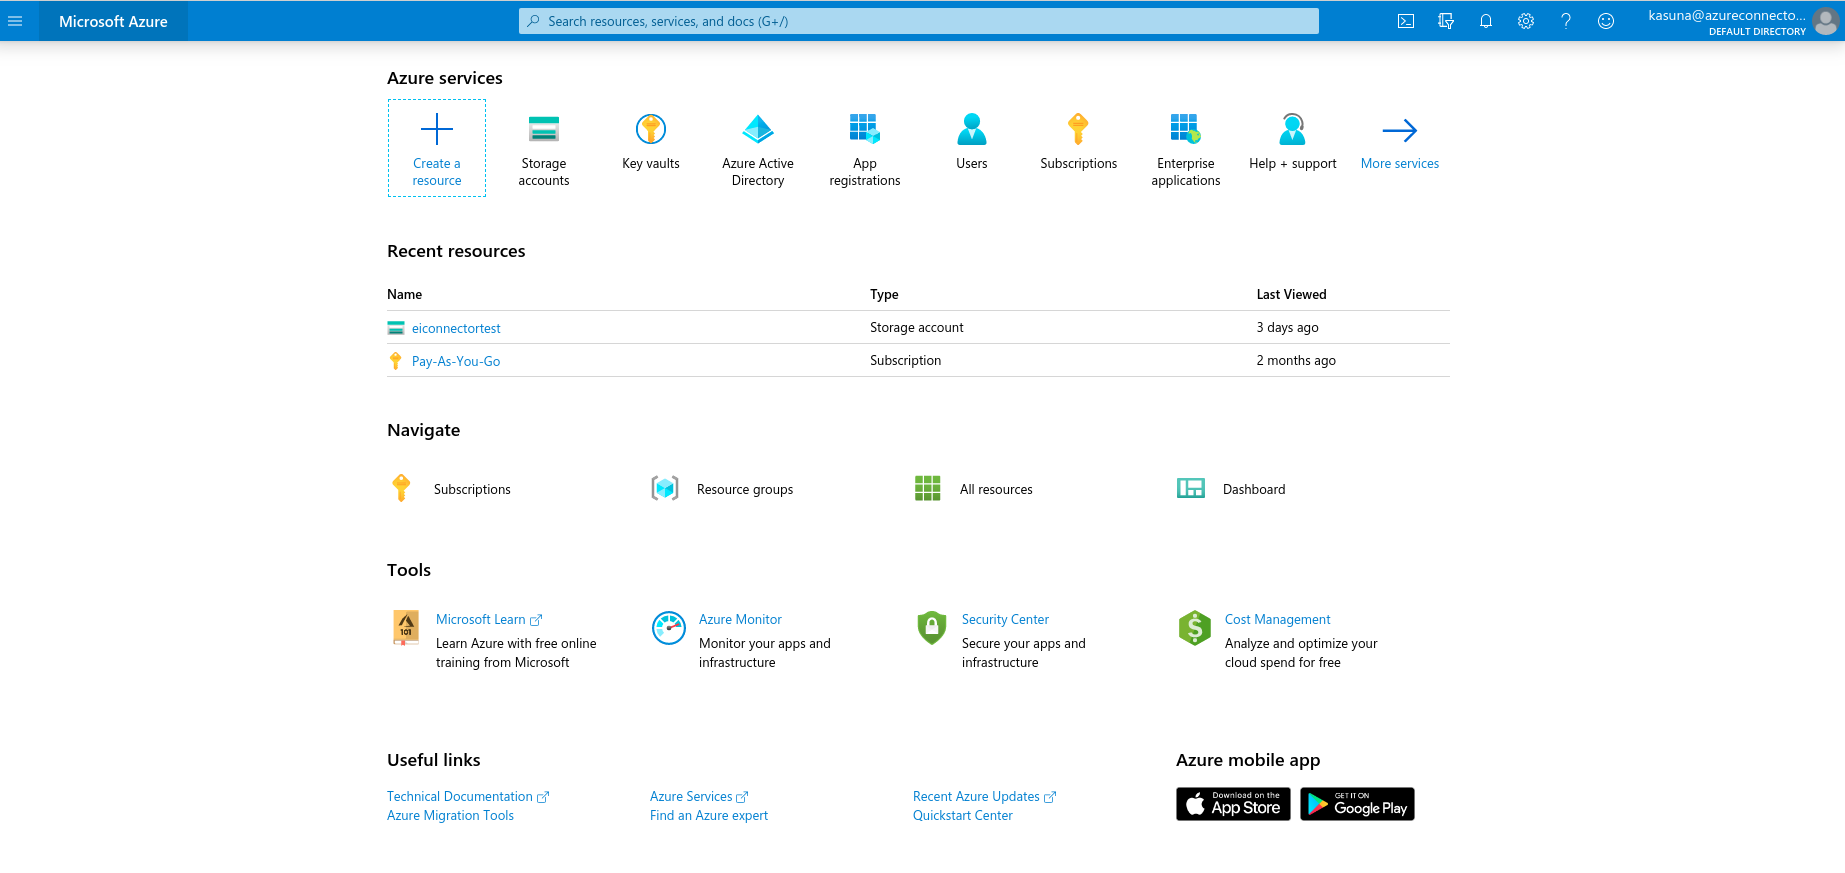 MS-azure-storage-select-account.png
 -
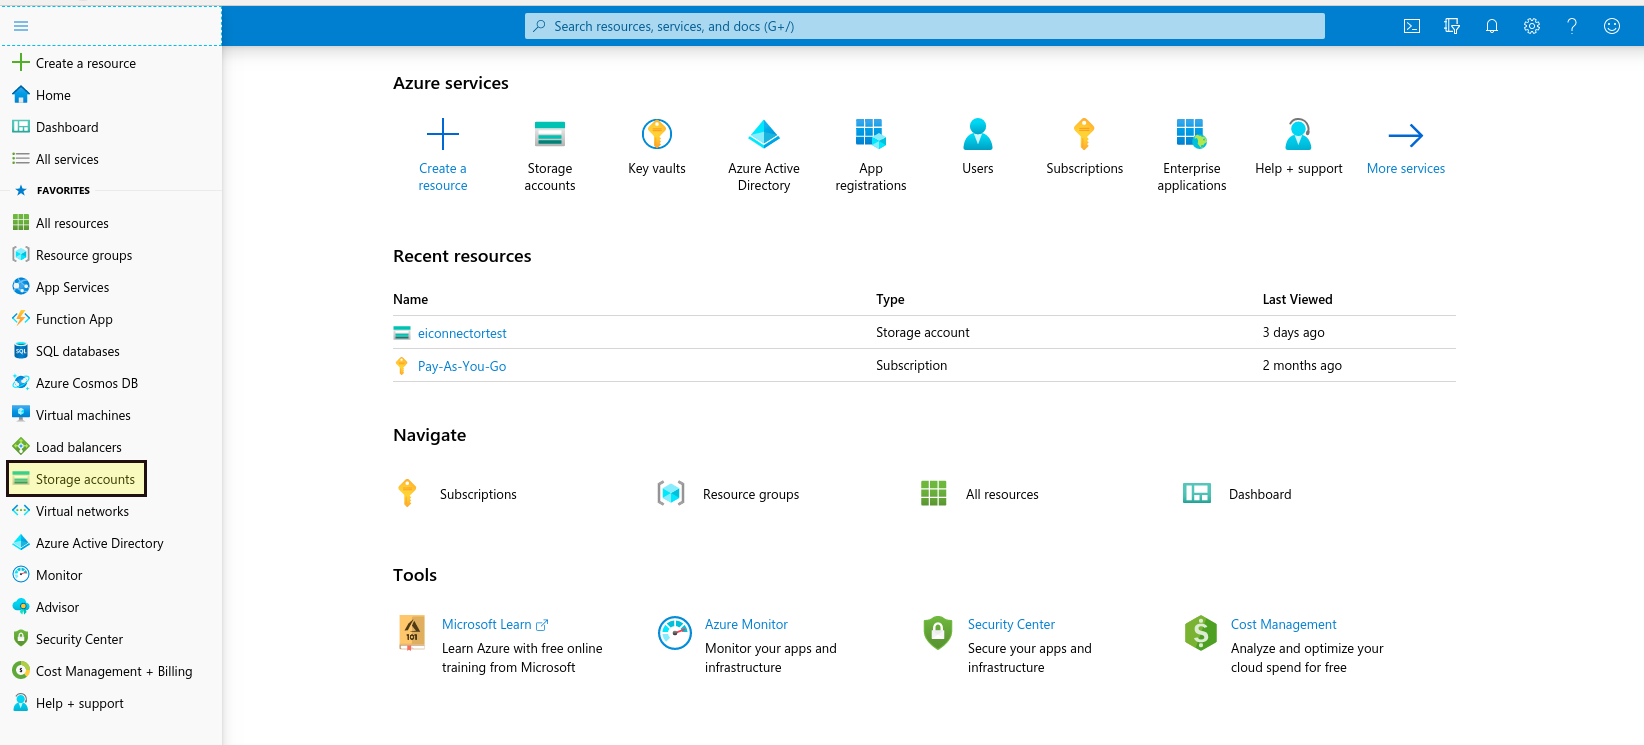
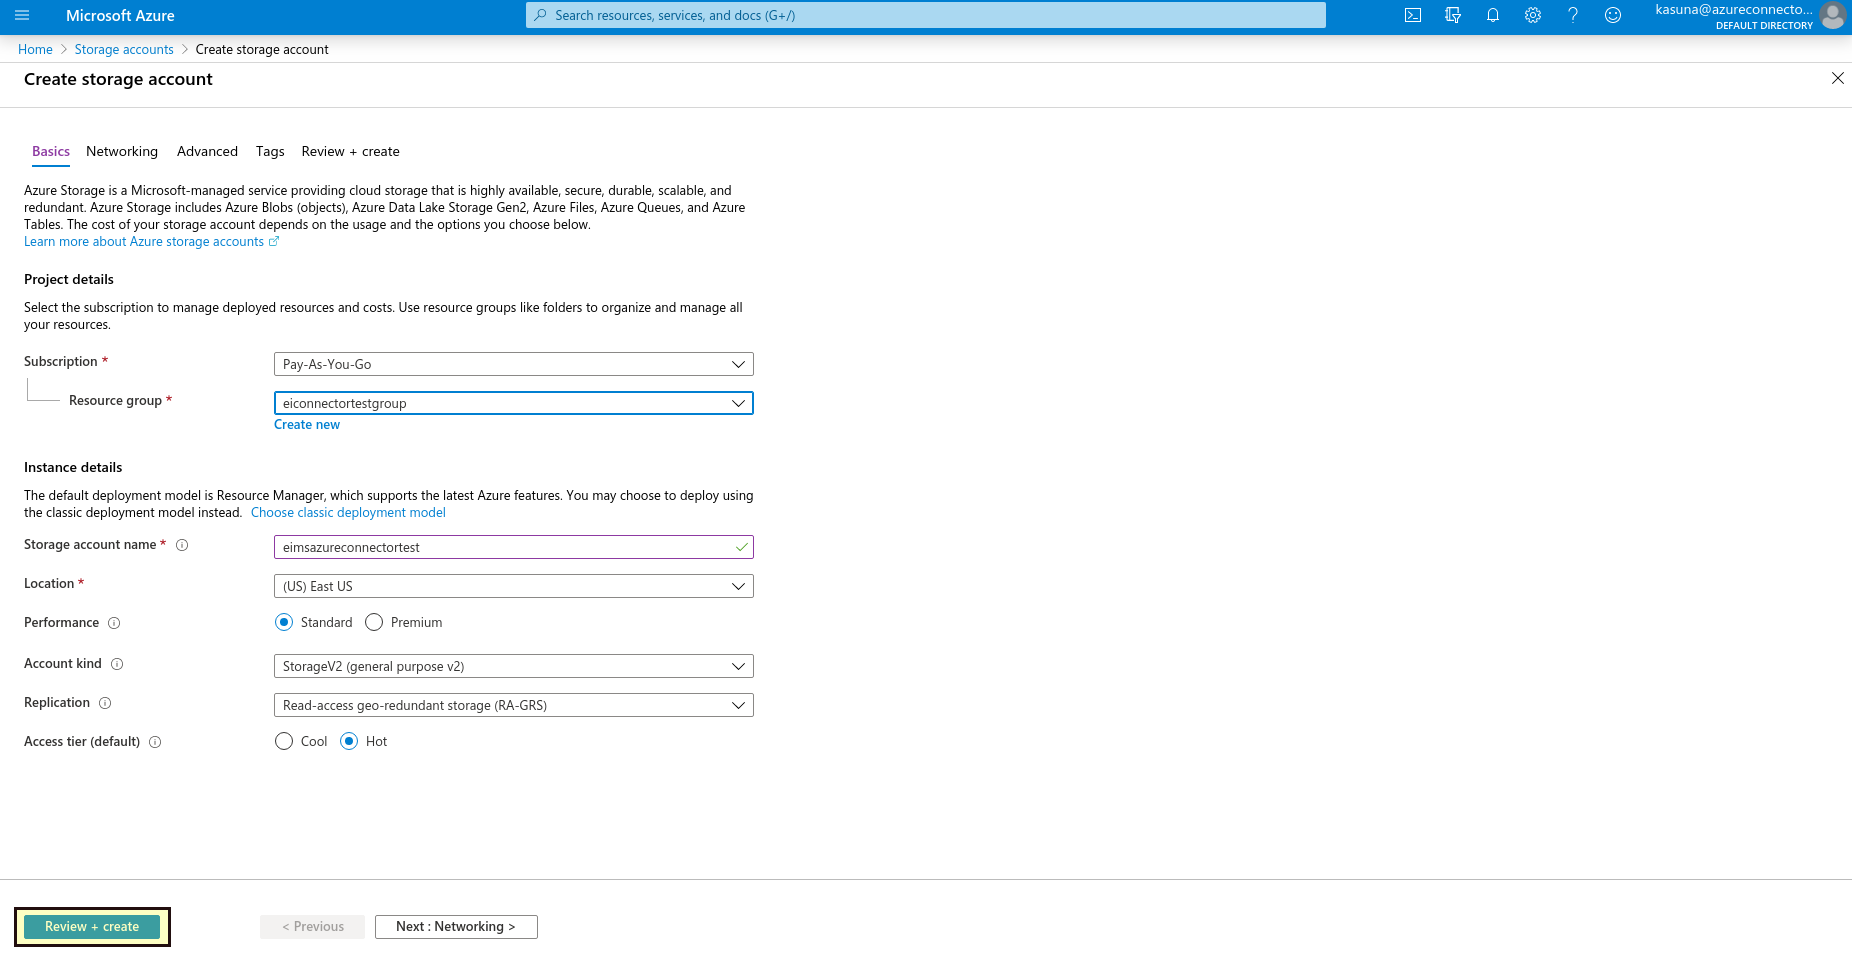
Go to the dashboard and click Storage accounts then click Add and fill the required details to create a new storage account.
-
On the Storage Accounts window that appears, choose Add.

-
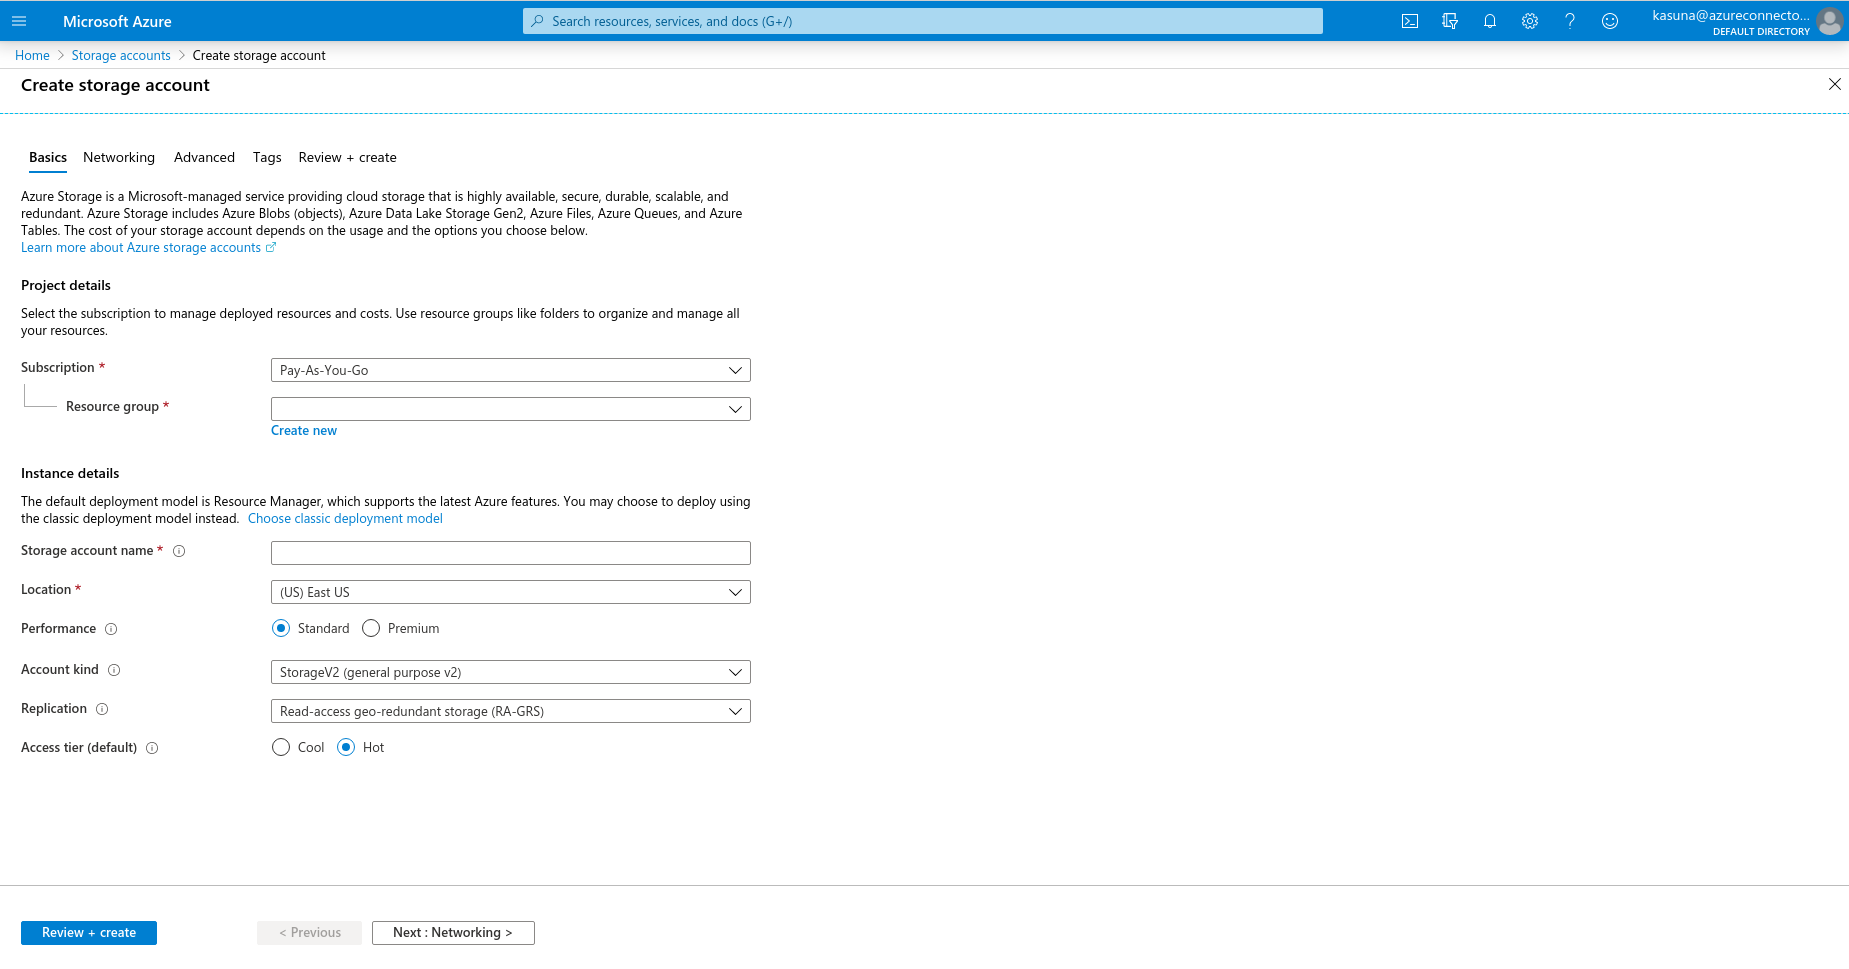
Select the subscription in which to create the storage account.
-
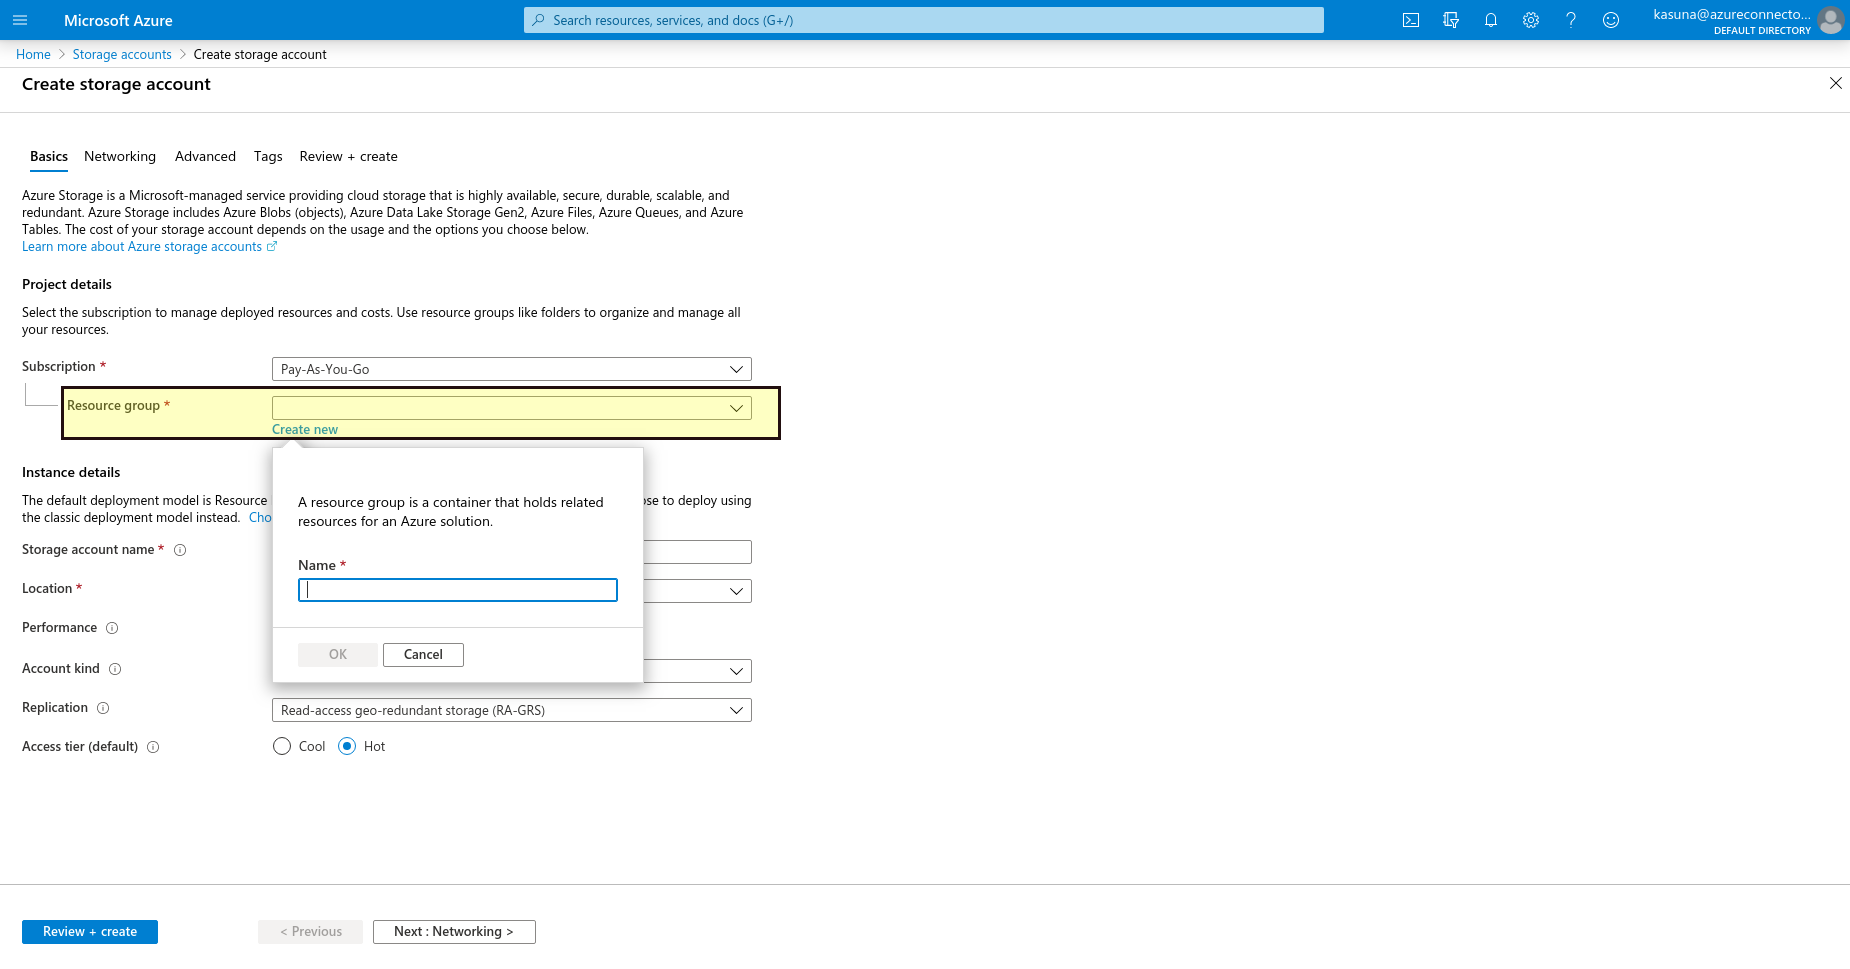
Under the Resource group field, select Create new. Enter a name for your new resource group.
-
Enter a name for your storage account.
-
Select a location for your storage account, or use the default location.
-
Leave these fields set to their default values:
Field Value Deployment model Resource Manager Performance Standard Replication Read-access geo-redundant storage (RA-GRS) Access tier Hot -
Select Review + Create to review your storage account settings and create the account.
-
Select Create.
Obtaining the Client credentials
Note
If you are planning to use Access key for authentication, skip this and check Obtaining the access credentials
-
Create an Azure Active Directory application and service principal. For more information refer Create an Azure Active Directory application.
-
Assign an Azure role for access to blob data. For more information refer Assign an Azure role and Assign an Azure role for access to blob data.
-
Obtain the Client ID, client Secret and Tenant ID. For more information refer Create a new application secret and Active Directory tenant ID.
Obtaining the Access Key
Note
If you are planning to use Client credentials for authentication, skip this and check Obtaining the Client credentials
-
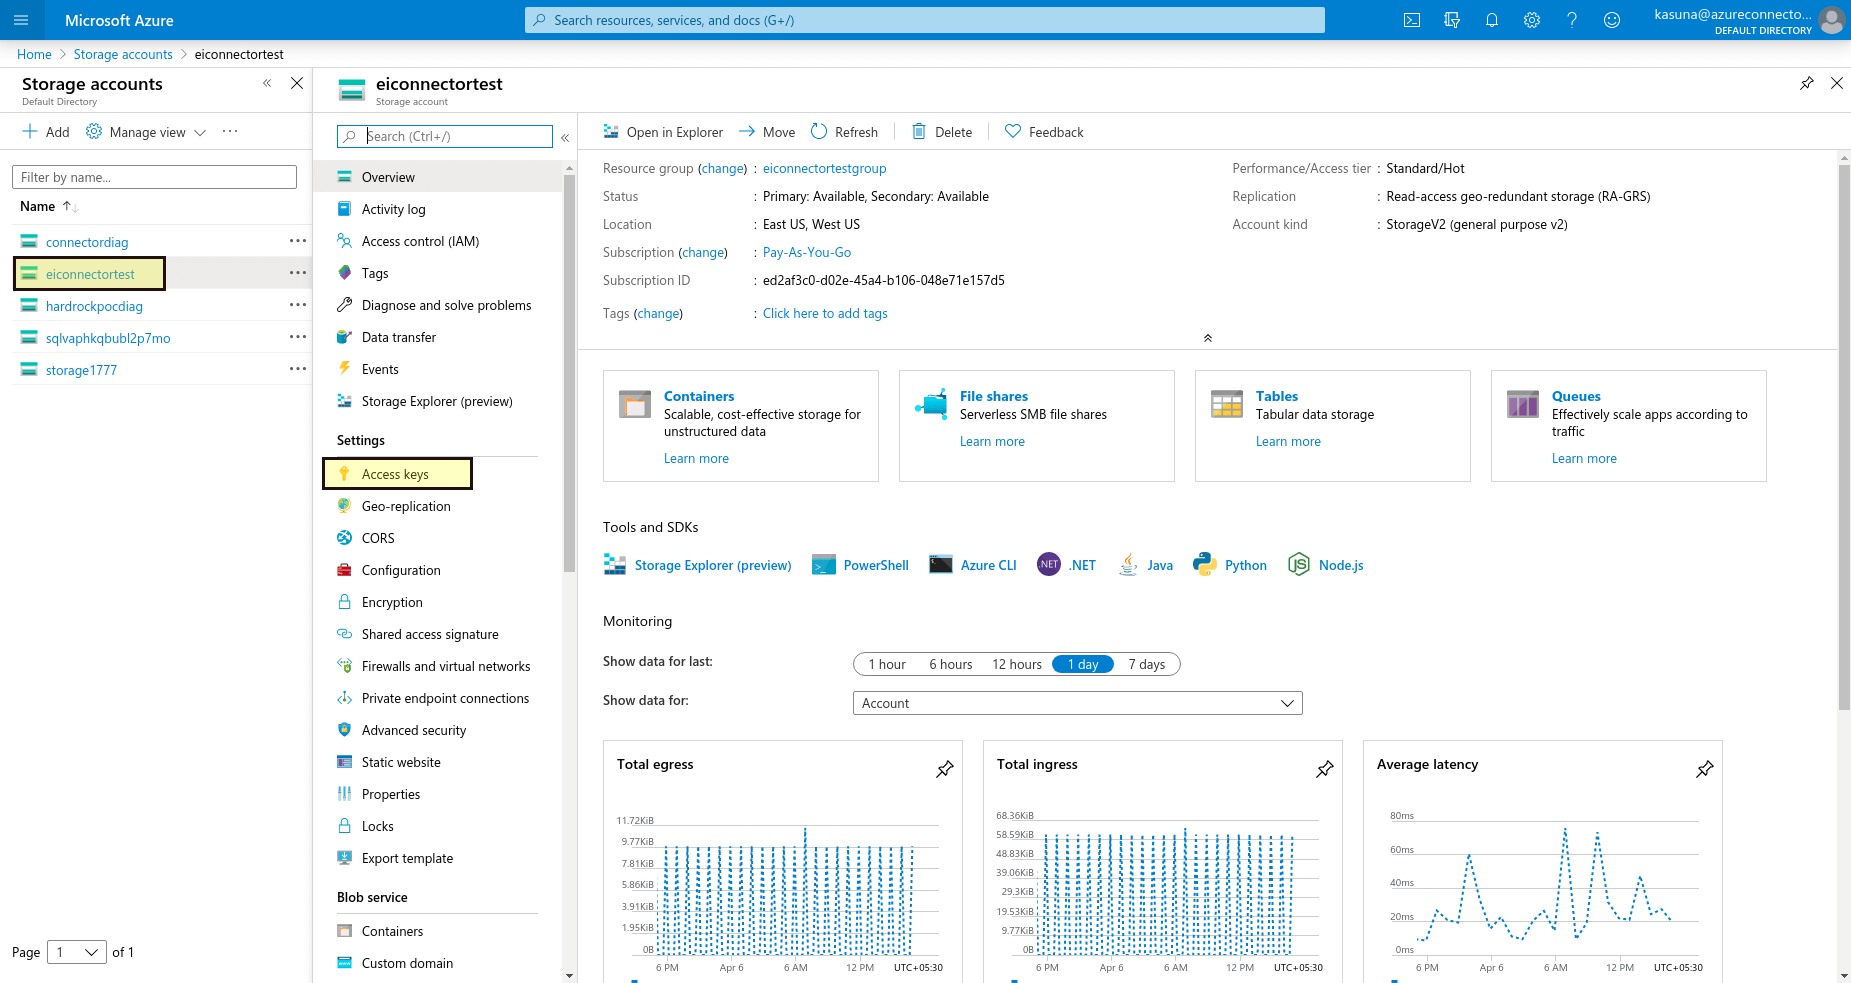
Navigate to the created storage account and click it.

-
Click Access keys under Settings.
-
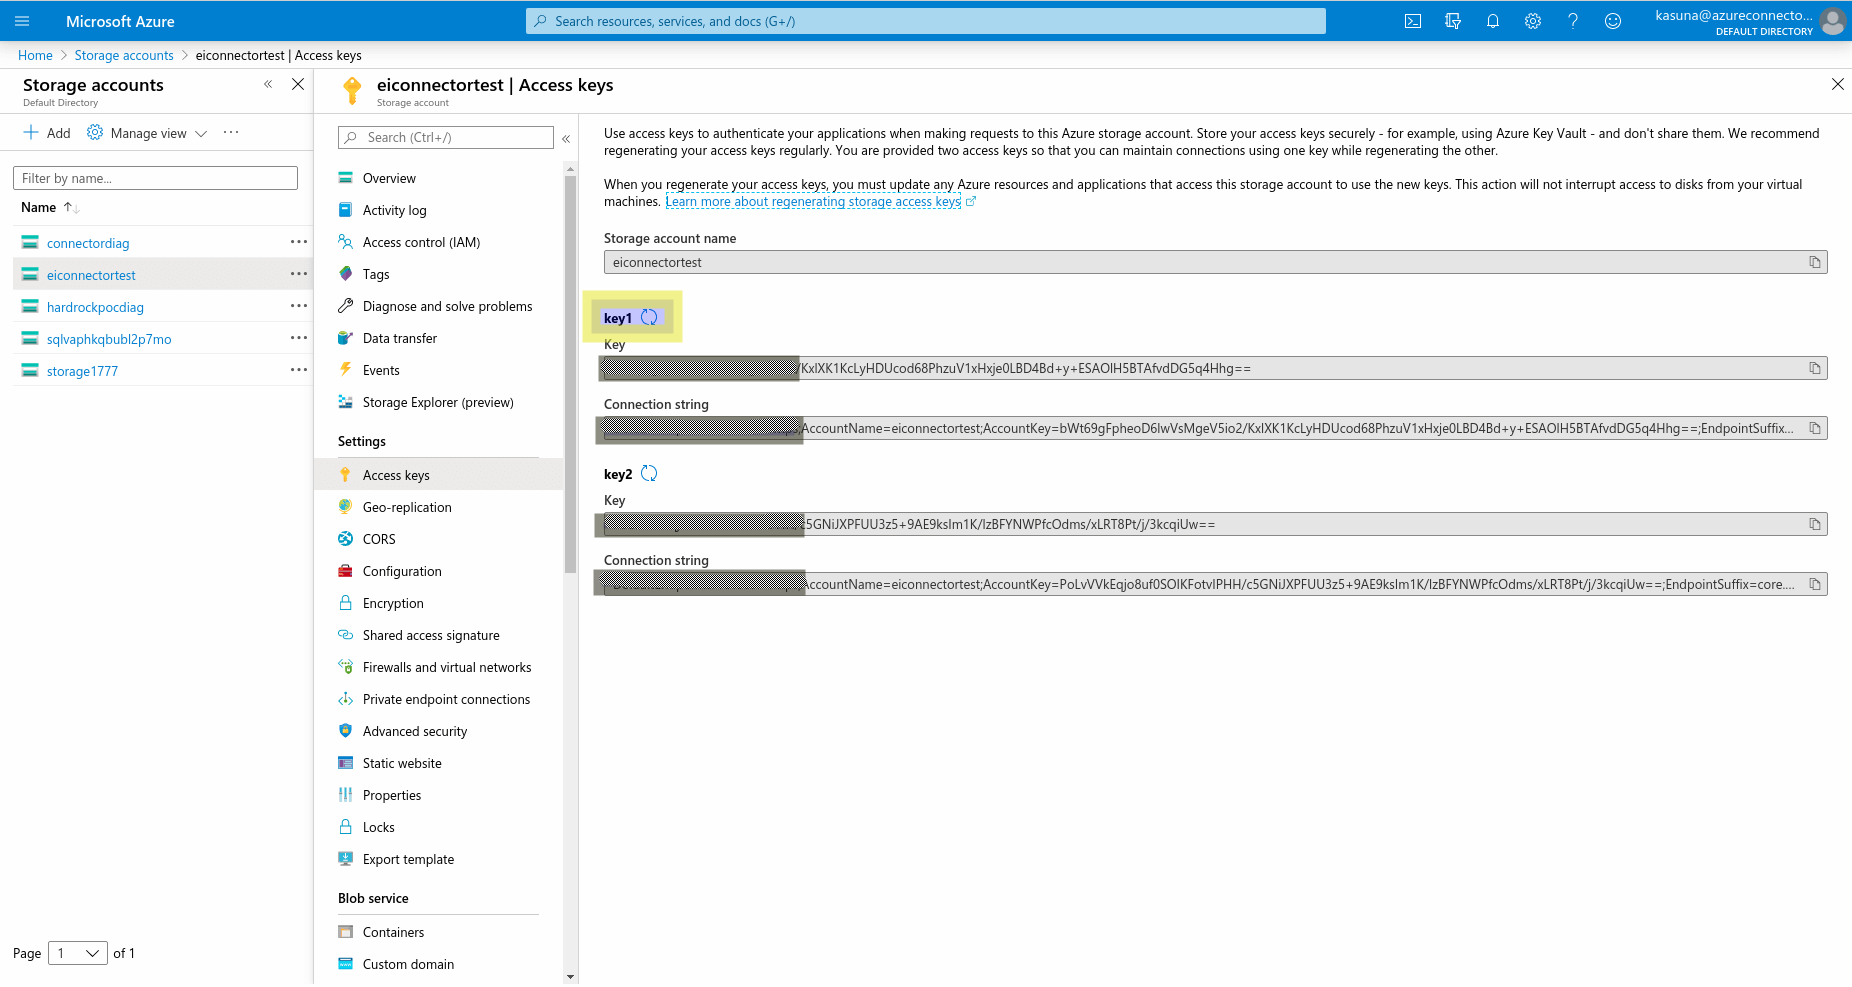
Obtain the access key.
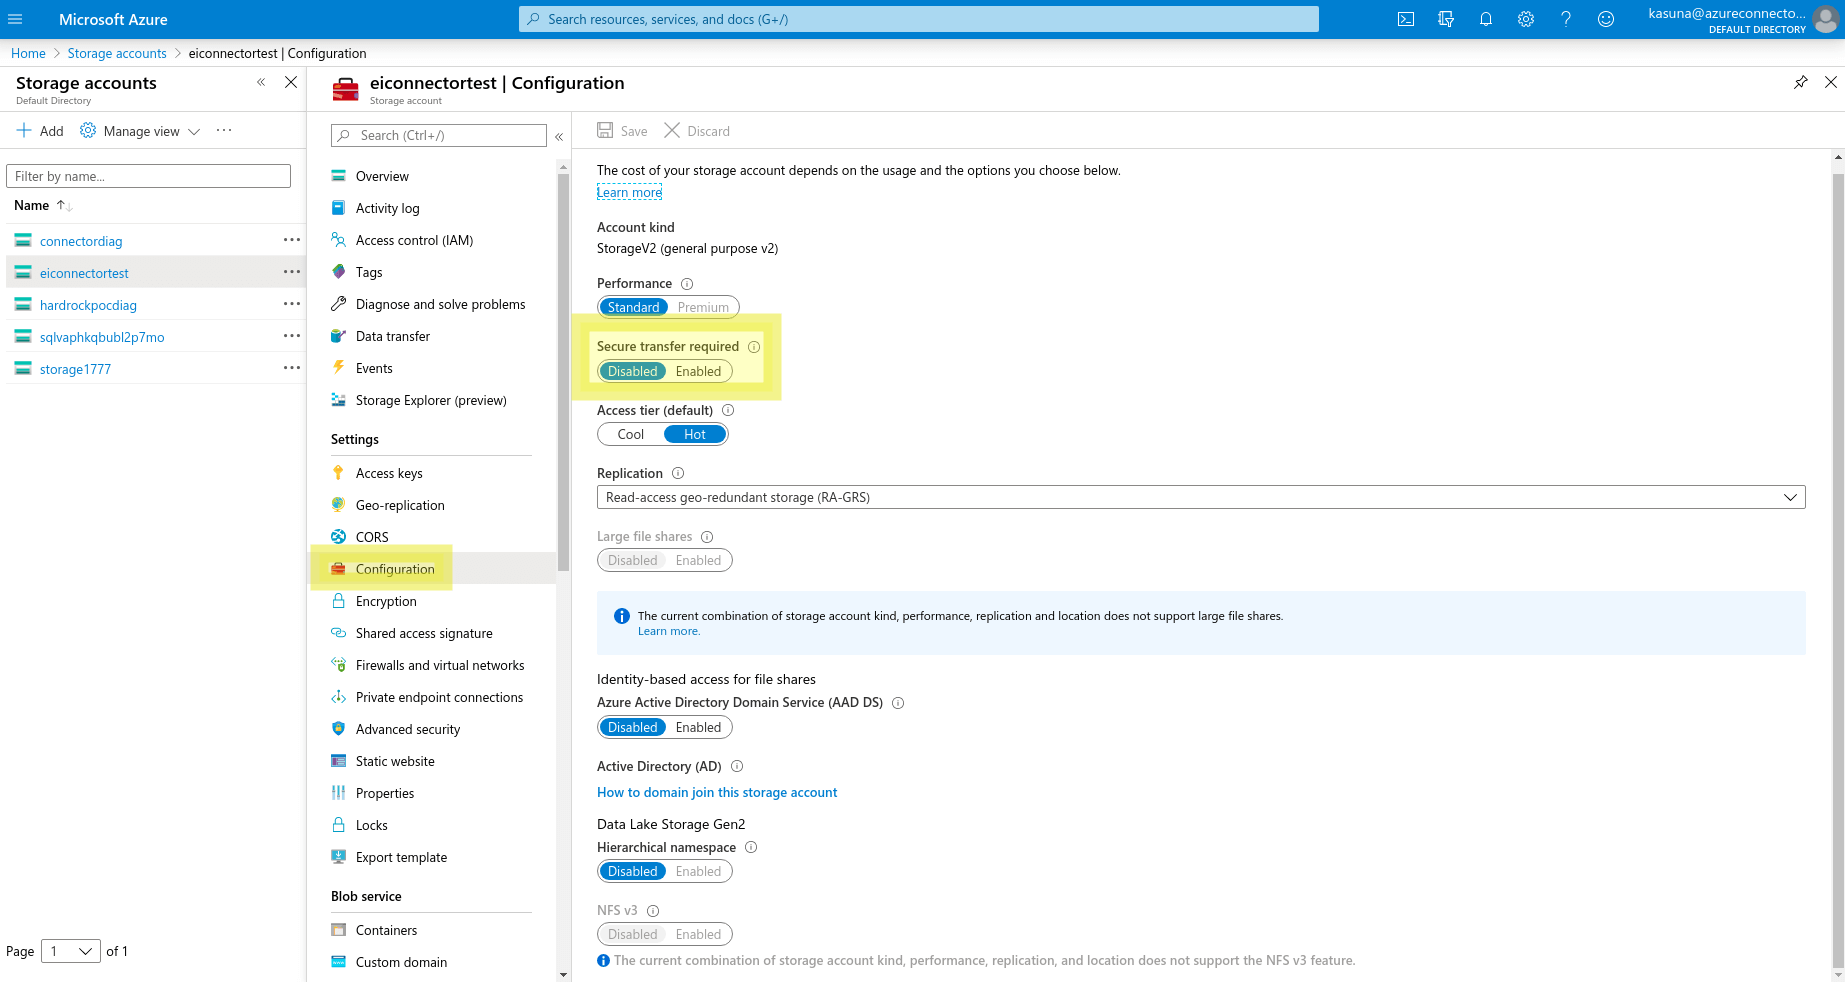
Note: Azure Storage Account does not support HTTP requests. If you are using a storage key to access the storage account, please set Secure transfer required to Disabled in storage account configuration on Azure Portal.
Setting up the Microsoft Azure Storage Connector
Before you start configuring the Microsoft Azure Storage Connector, you also need the ESB integration runtime and we refer to that location as <PRODUCT_HOME>.
Note
If you are using the older connector 1.x.x add only the azure-storage-6.1.0.jar jar to <PRODUCT_HOME>/lib directory and skip the following.
In order to use the Microsoft Azure Storage connector, you need to download the following jars and move them to the <PRODUCT_HOME>/lib directory.
- azure-storage-blob-12.23.0.jar
- azure-identity-1.9.2.jar
- azure-storage-common-12.22.0.jar
- azure-json-1.0.1.jar
- azure-core-http-netty-1.13.5.jar
- msal4j-1.13.8.jar
- content-type-2.2.jar
- netty-resolver-dns-4.1.95.Final.jar
- reactive-streams-1.0.4.jar
- reactor-netty-http-1.1.9.jar
- jackson-dataformat-xml-2.13.5.jar
- oauth2-oidc-sdk-10.7.1.jar
- reactor-core-3.4.30.jar
- stax2-api-4.2.1.jar
- reactor-netty-core-1.1.9.jar
- woodstox-core-6.4.0.jar
Note
If you are using MI 4.0.0, in addition to the above you need to add netty-codec-http2-4.1.95.Final.jar and netty-handler-proxy-4.1.95.Final.jar to <PRODUCT_HOME>/lib directory.
Note
By default INFO logs are enabled for the Microsoft Azure SDKs, therefore you may need to update the log4j2.properties of the ESB integration runtime (MI) accordingly to set the log level. The following configuration will disable the logs printed by the SDK. Eventhough the SDK logs are disabled, MI will print them in case of an error.
-
Add the following loggers.
logger.Azure.name = com.azure logger.Azure.level = OFF logger.Microsoft.name = com.microsoft logger.Microsoft.level = OFF -
Append
AzureandMicrosoftto the loggers list.