File Connector Example
File Connector can be used to perform operations in the local file system as well as in a remote server such as FTP and SFTP.
What you'll build
This example describes how to use the File Connector to write messages to local files and then read the files. Similarly, the same example can be configured to communicate with a remote file system (i.e FTP server) easily. The example also uses some other ESB mediators to manipulate messages.
An API is exposed to accept XML messages (employee information). When a message is received, it is converted to a CSV message and then stored to a property. A check is done to see if the CSV file (with the same information) exists in the file system. If it does not exist, the connector creates a CSV file with CSV headers included. Then, the connector appends the new CSV entries in the current message to the CSV file. The connector then reads the same CSV file and converts the information back to XML and responds to the client.
Setting up the environment
Create a folder in your local file system with read and write access. This will be your working directory. In this example, it is /Users/hasitha/temp/file-connector-test/dataCollection.
Note
If you set up a FTP server, SFTP server, or a Samba server, do the required configurations and select a working directory. Save the host, port, and security related information for future use.
Configure the connector in ESB Integration Studio
Follow these steps to set up the Integration Project and the Connector Exporter.
-
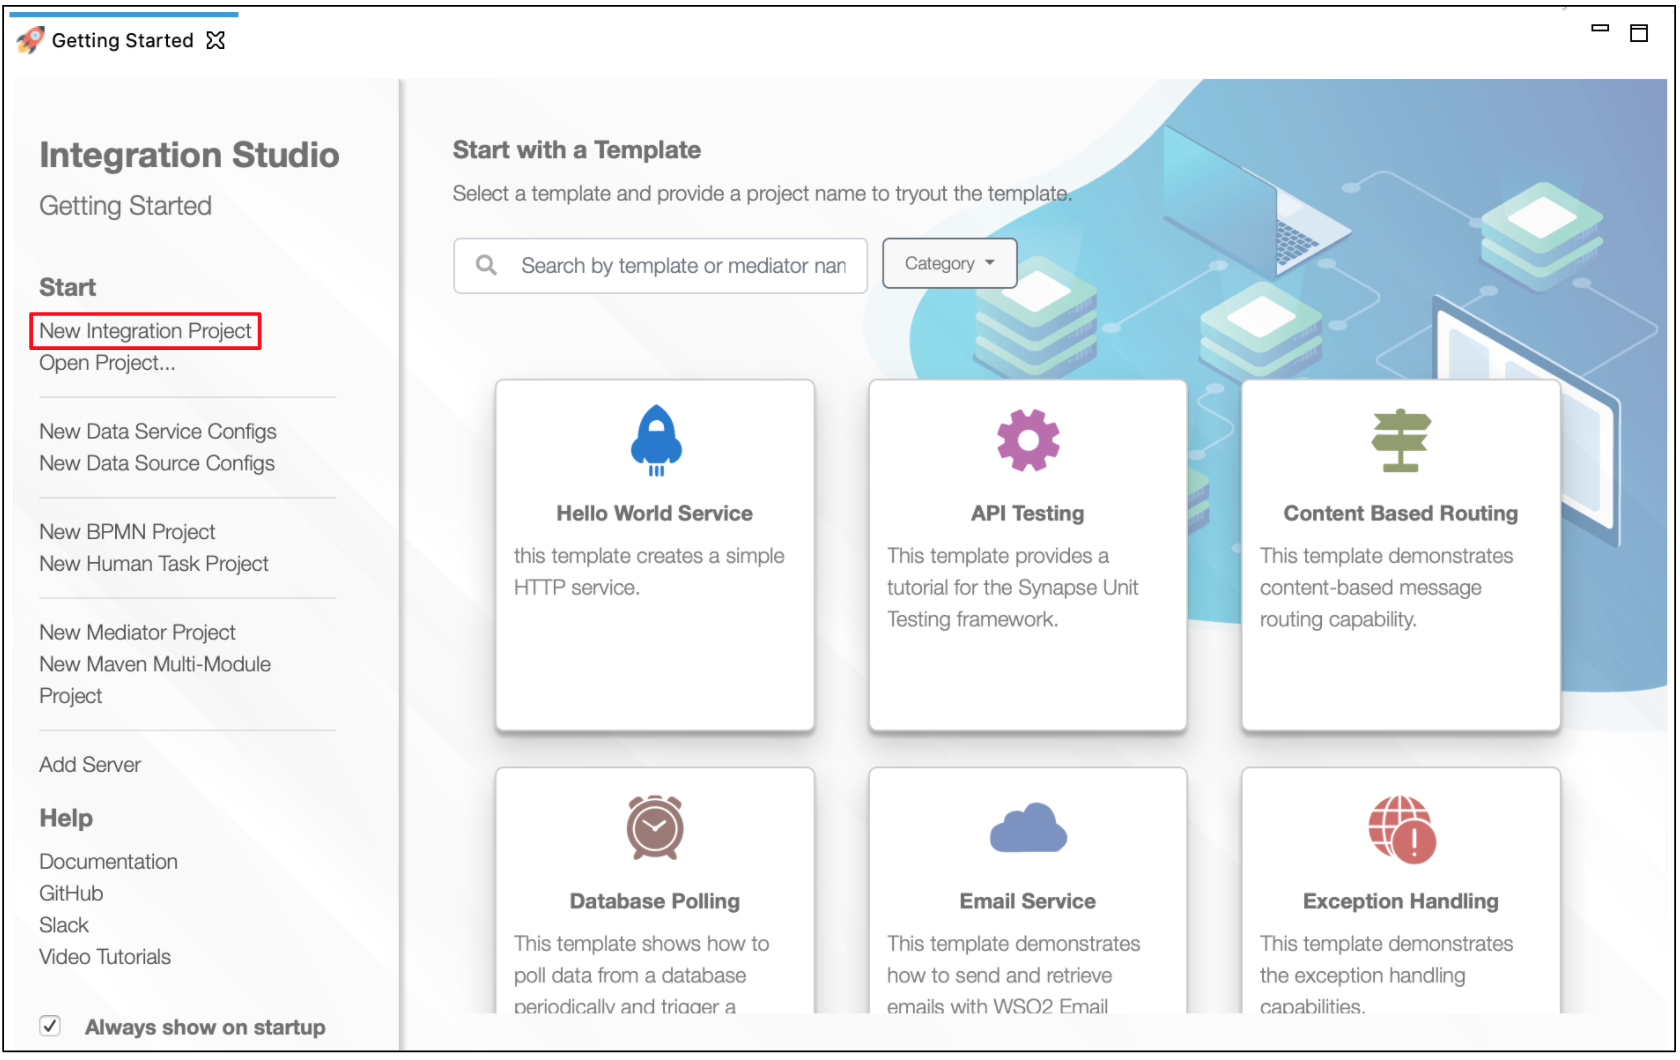
Open ESB Integration Studio and create an Integration Project.
-
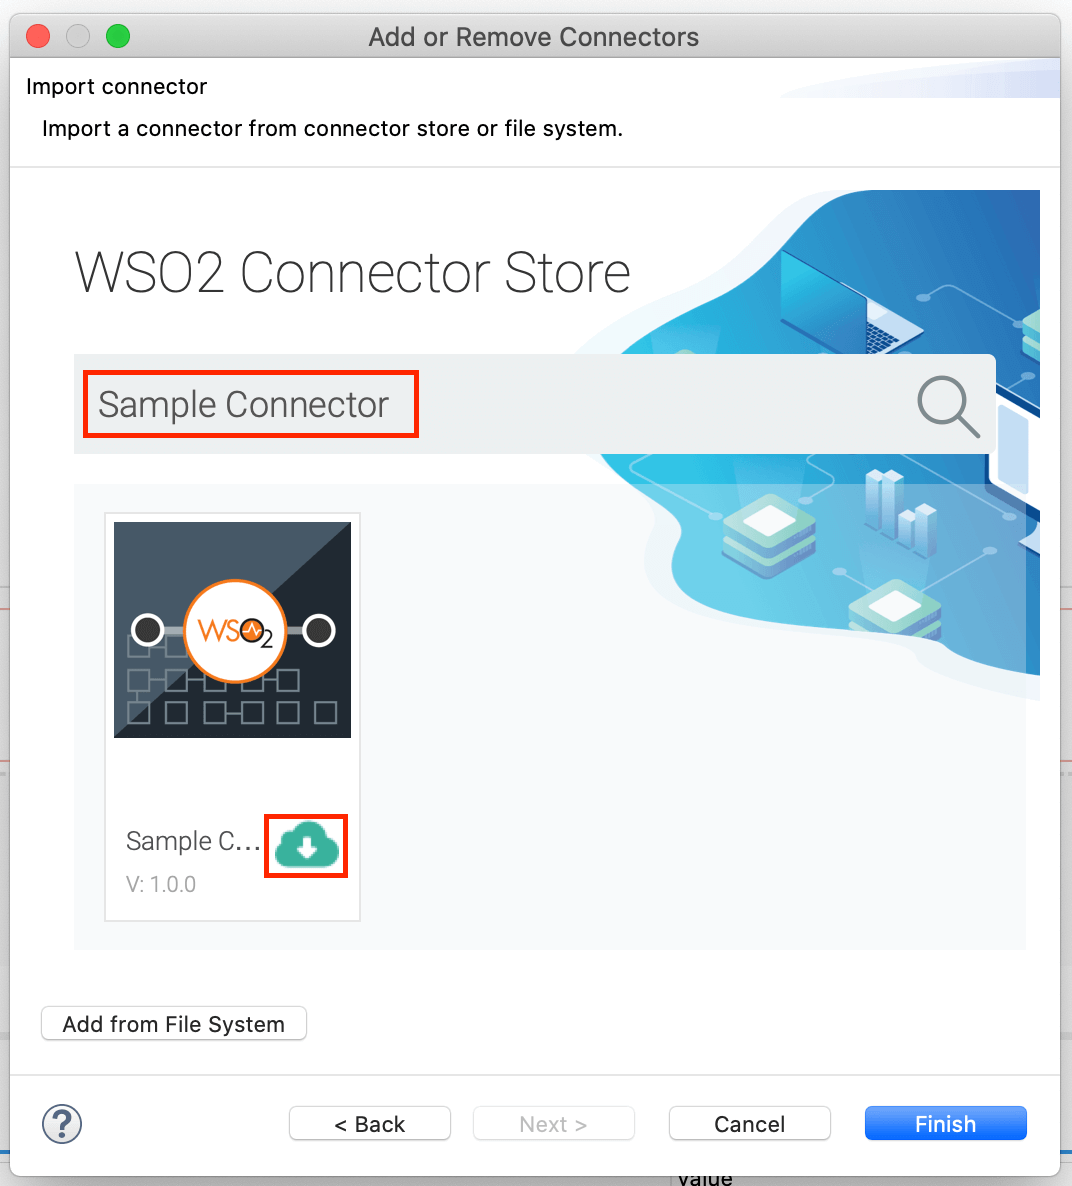
Right-click the project that you created and click on Add or Remove Connector -> Add Connector. You will get directed to the Connector Store.
-
Search for the specific connector required for your integration scenario and download it to the workspace.
-
Click Finish, and your Integration Project is ready. The downloaded connector is displayed on the side palette with its operations.
-
You can drag and drop the operations to the design canvas and build your integration logic.

-
Right click on the created Integration Project and select New -> Rest API to create the REST API.
Creating the Integration Logic
-
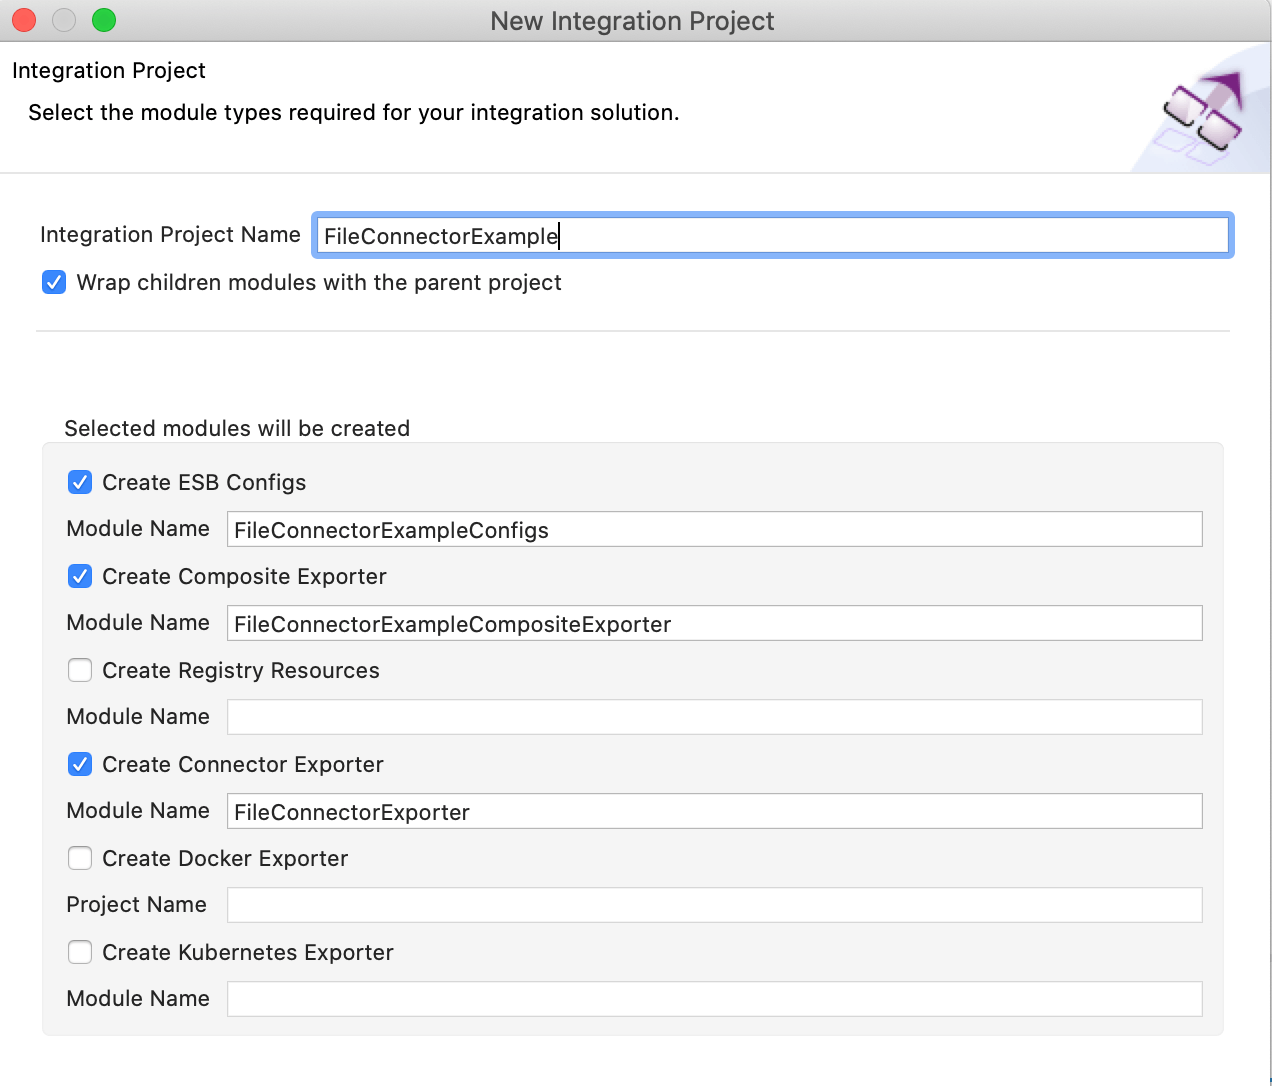
Create a new integration project. Be sure to enable a Connector Exporter.
-
Create an API named
TestAPIwith the/fileTestcontext. This API will accept employee information.
-
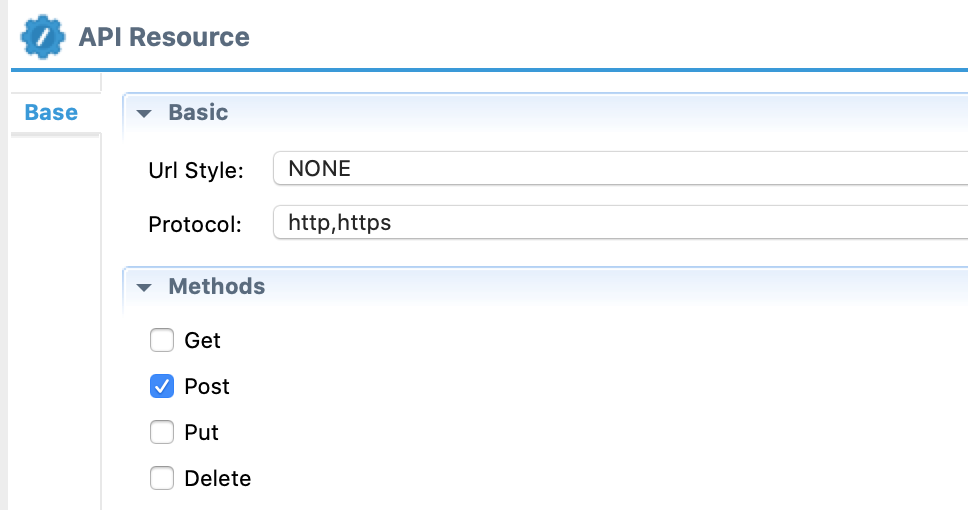
In the default resource of the API, enable POST requests.
-
Add the Log mediator to the design canvas and configure a custom log that indicates when the API receives a message.
- Add the DataMapper mediator and configure it to transform the incoming XML message to a CSV message.
-
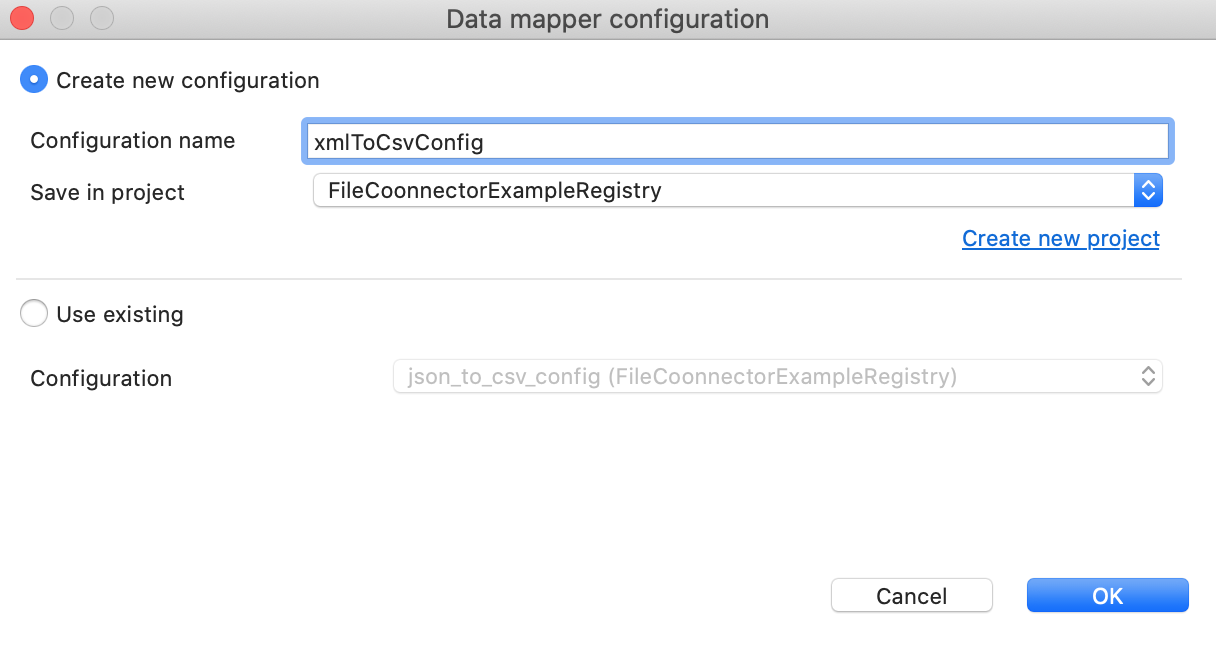
Double-click the Datamapper mediator and add a new transform configuration called 'xmlToCsv'.
-
Save the following content as an XML file. This will be the data input file.
<test> <information> <people> <person> <name>Hasitha</name> <age>34</age> <company>wso2</company> </person> <person> <name>Johan</name> <age>32</age> <company>IBM</company> </person> </people> </information> </test> -
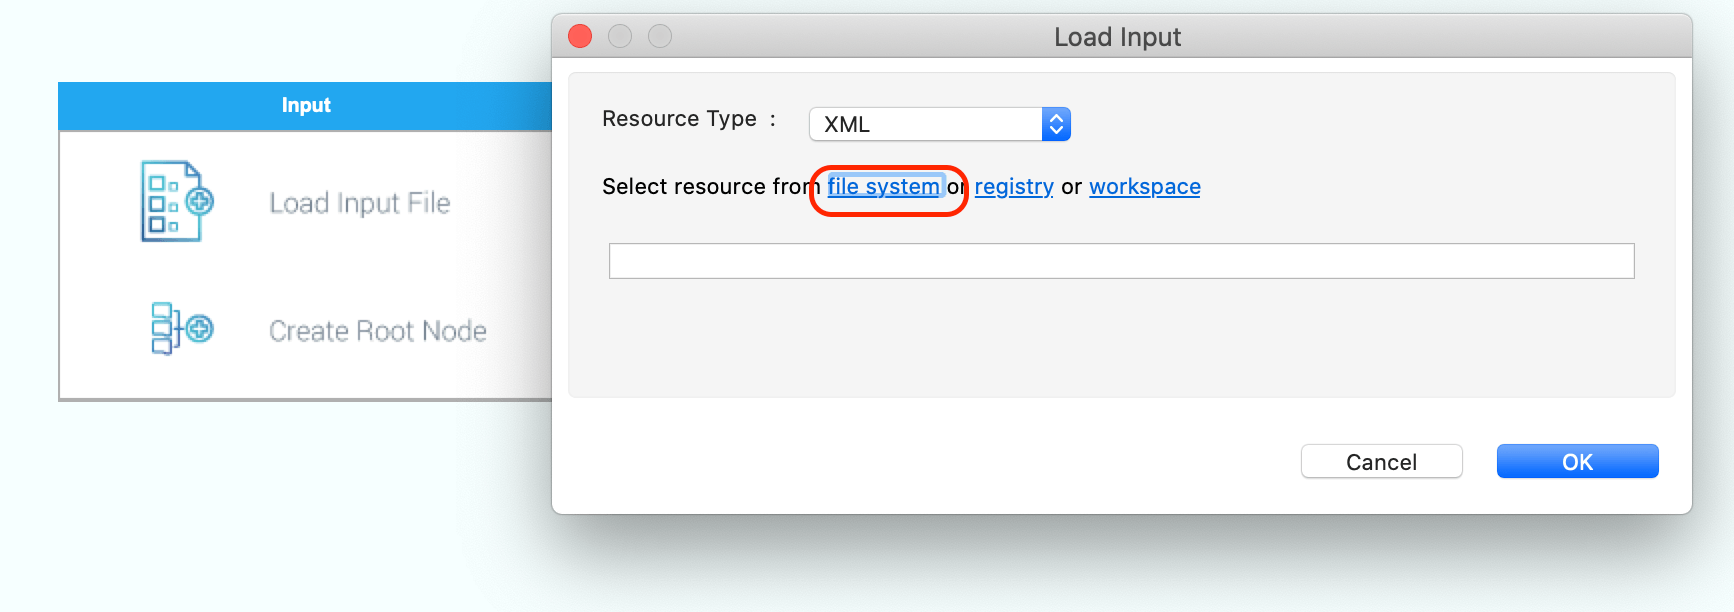
Load the input file into the Datamapper config view.
-
Save the following content as a CSV file. This will be the data output file.
Name,Age,Company Hasitha,34,wso2 Johan,32,IBM -
Load the output CSV file into the datamapper config view.
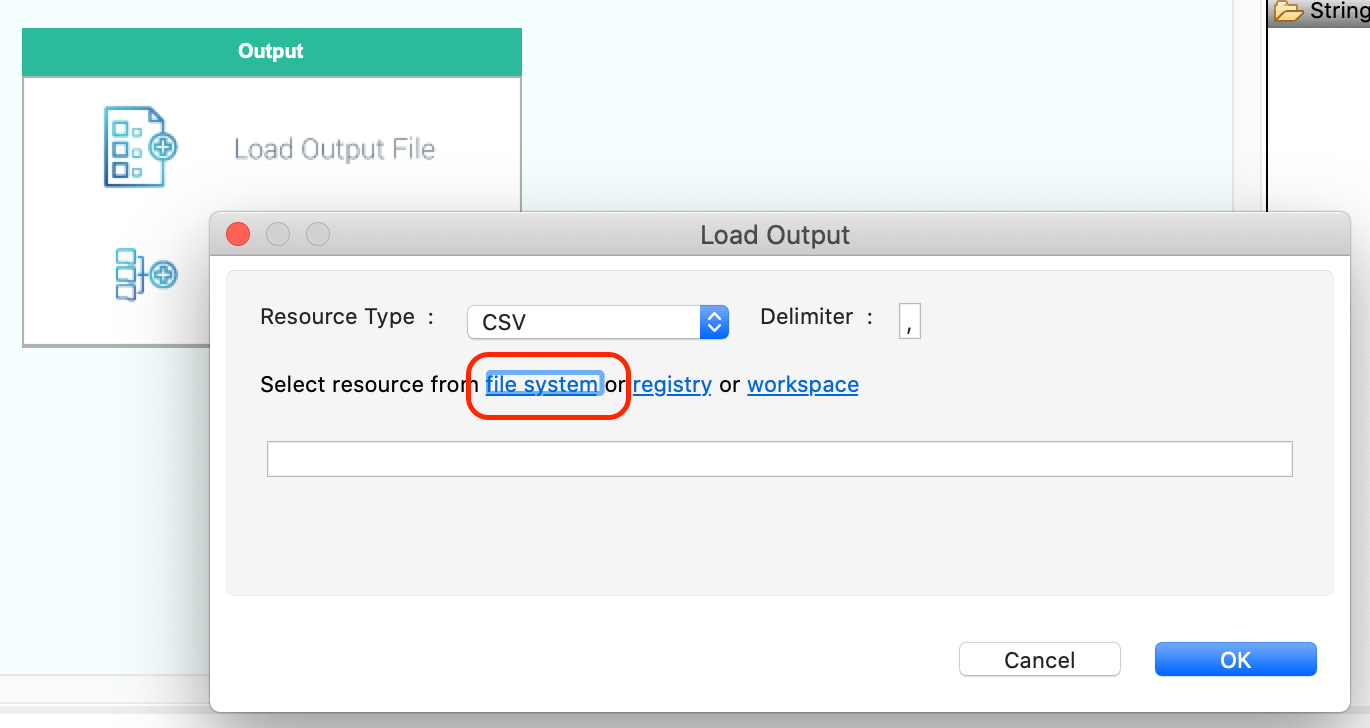
-
Configure the mapping as shown below. Each element in the input should be mapped to the respective element in the output.

-
Specify the input as XML and output as CSV in the datamapper as shown below.

-
Add the Enrich mediator and configure it to save the output generated by the datamapper to a property named
CONTENT.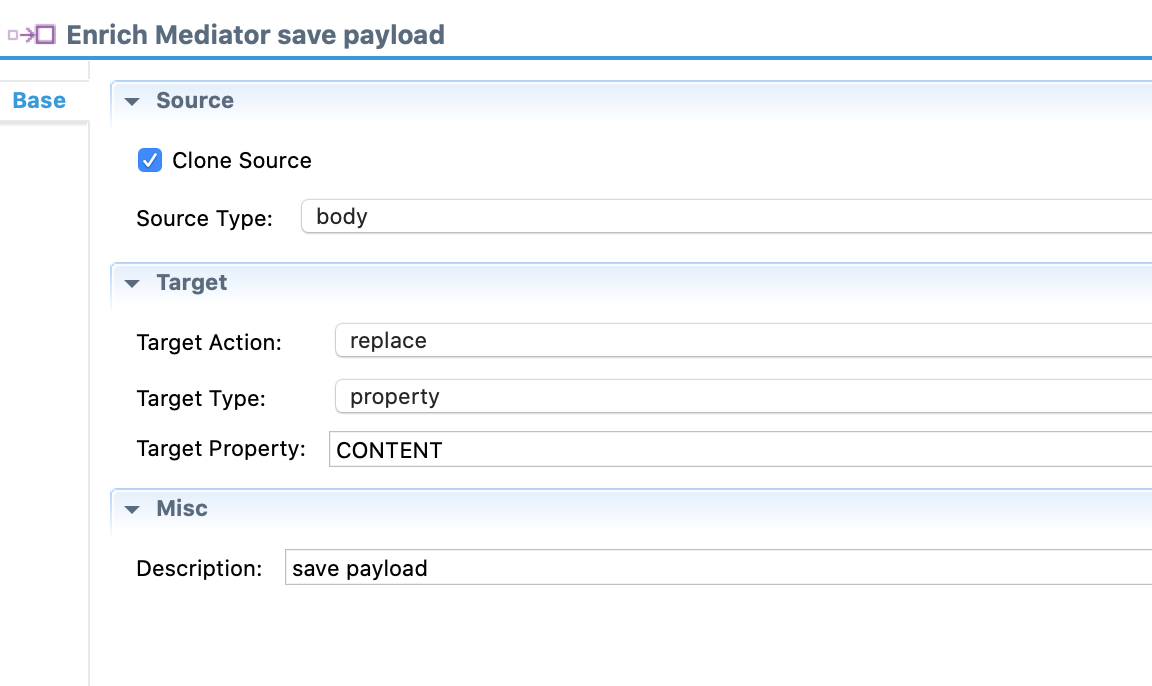
-
Now, let's use the File connector to check if the file containing employee information already exists in the file system.
- Add the checkExist operation of the File connector to the canvas.
-
Create a new file connection pointing to the working directory we already set up. Keep this as the File connection for the operation.
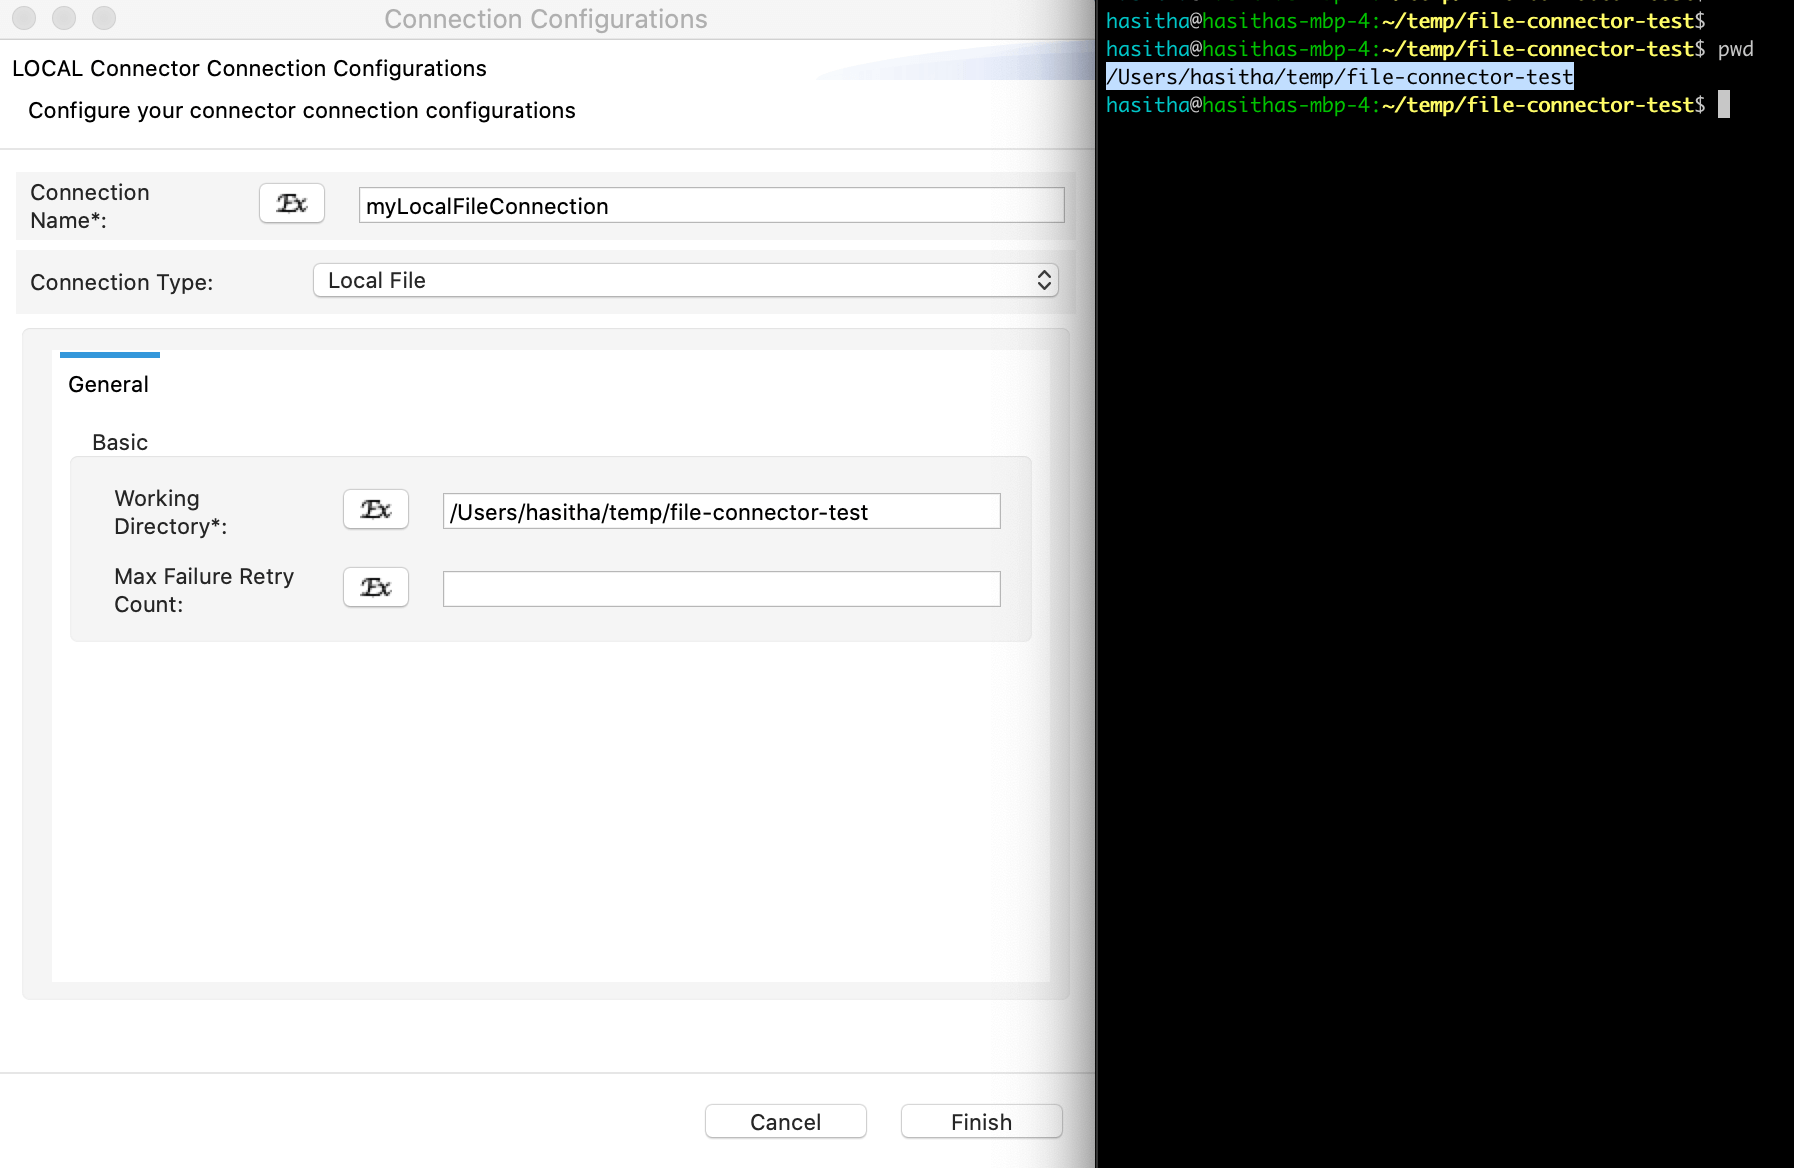
-
Configure the file path as
/dataCollection/employees/employees.csv. This file will store the employee information.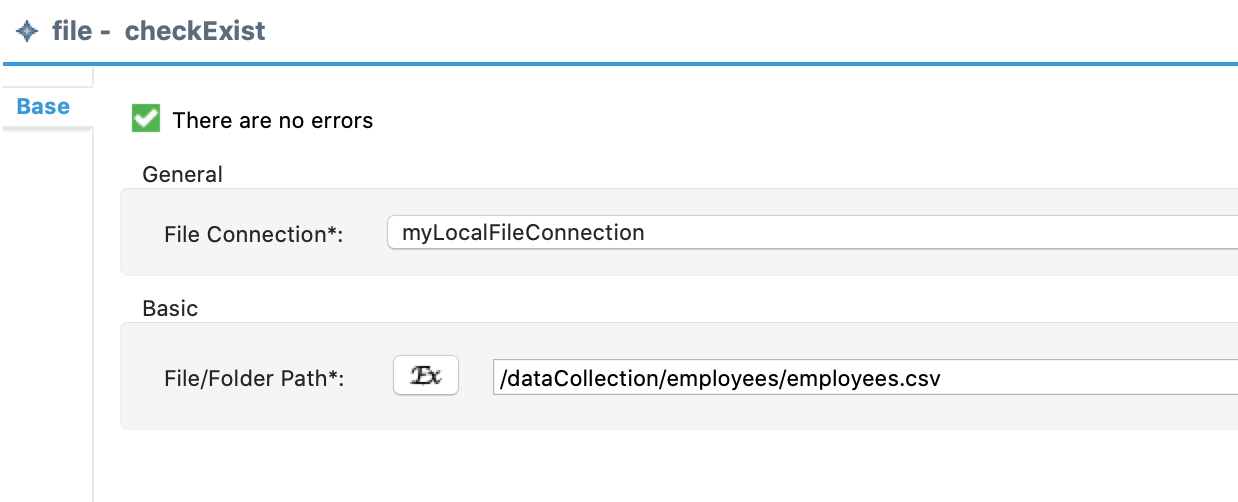
-
Add the Filter mediator to branch out the logic based on the result from the File connector’s
checkExistoperation.Note
If the file does not exist, the File connector’s write operation (which we configure later) will create the file.
-
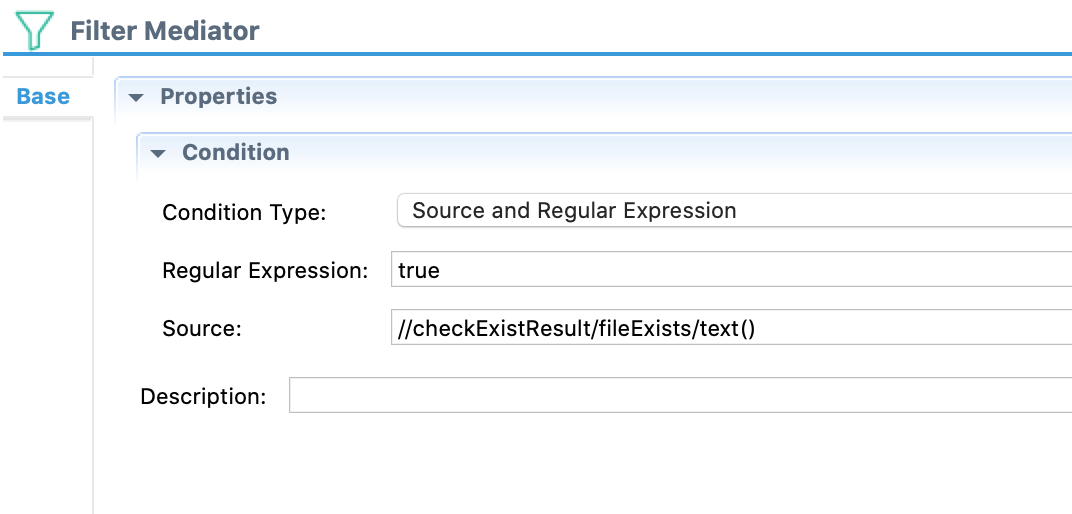
Click the Filter mediator and define the filter condition as shown below.
-
Inside the “else” block, add the File Connector's write operation and configure it to write the static content of CSV file headers: “Name,Age,Company”.
Note
Be sure to append a new line at the end of the file. The Write Mode needs to be
Create New.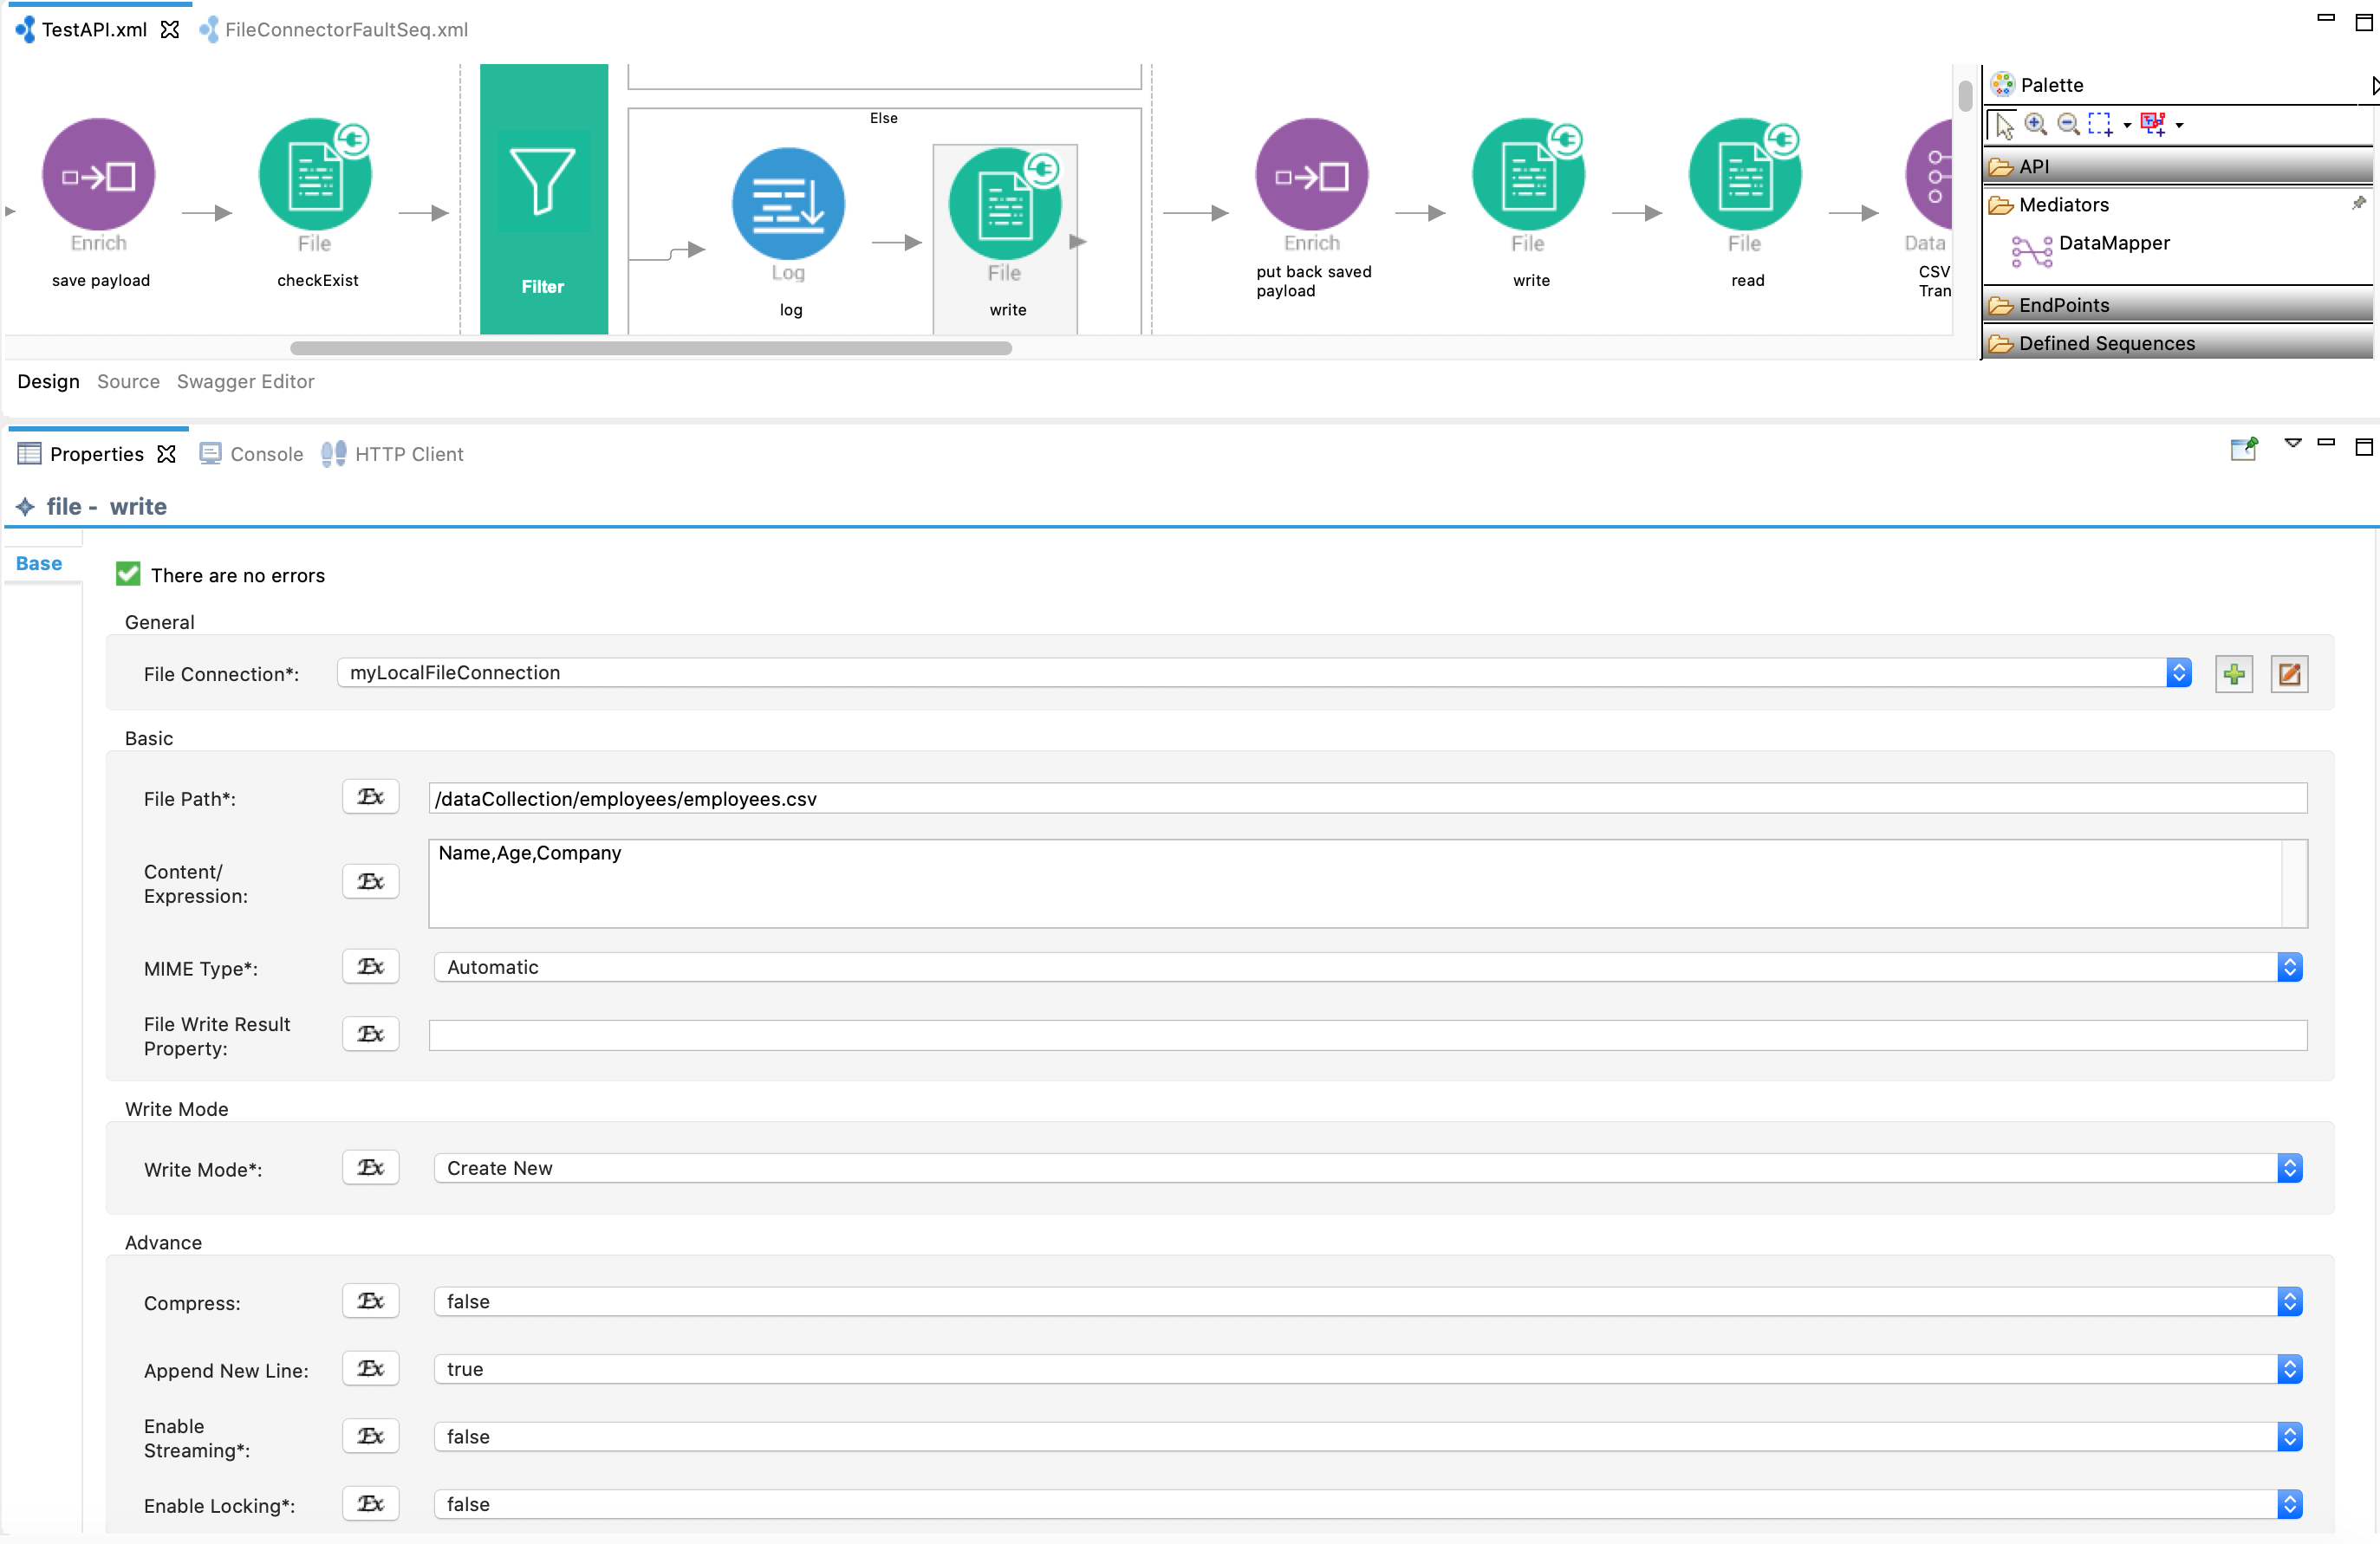
-
-
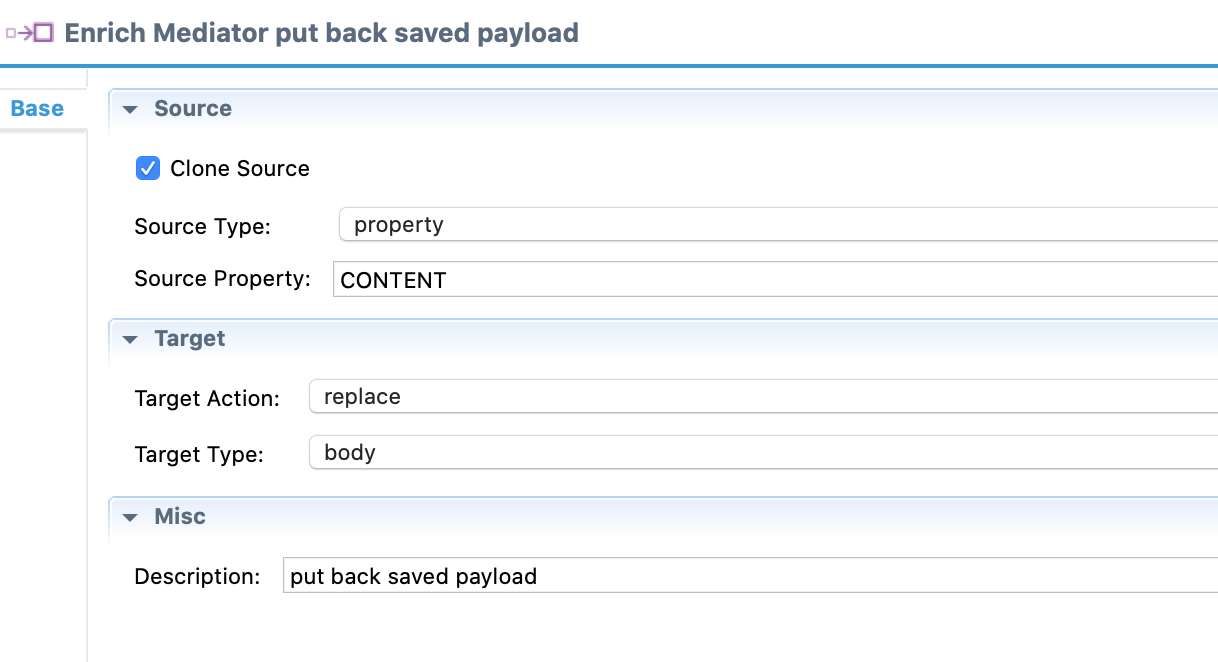
After the Filter mediator, use the Enrich mediator again to put back the saved payload into the message payload.
-
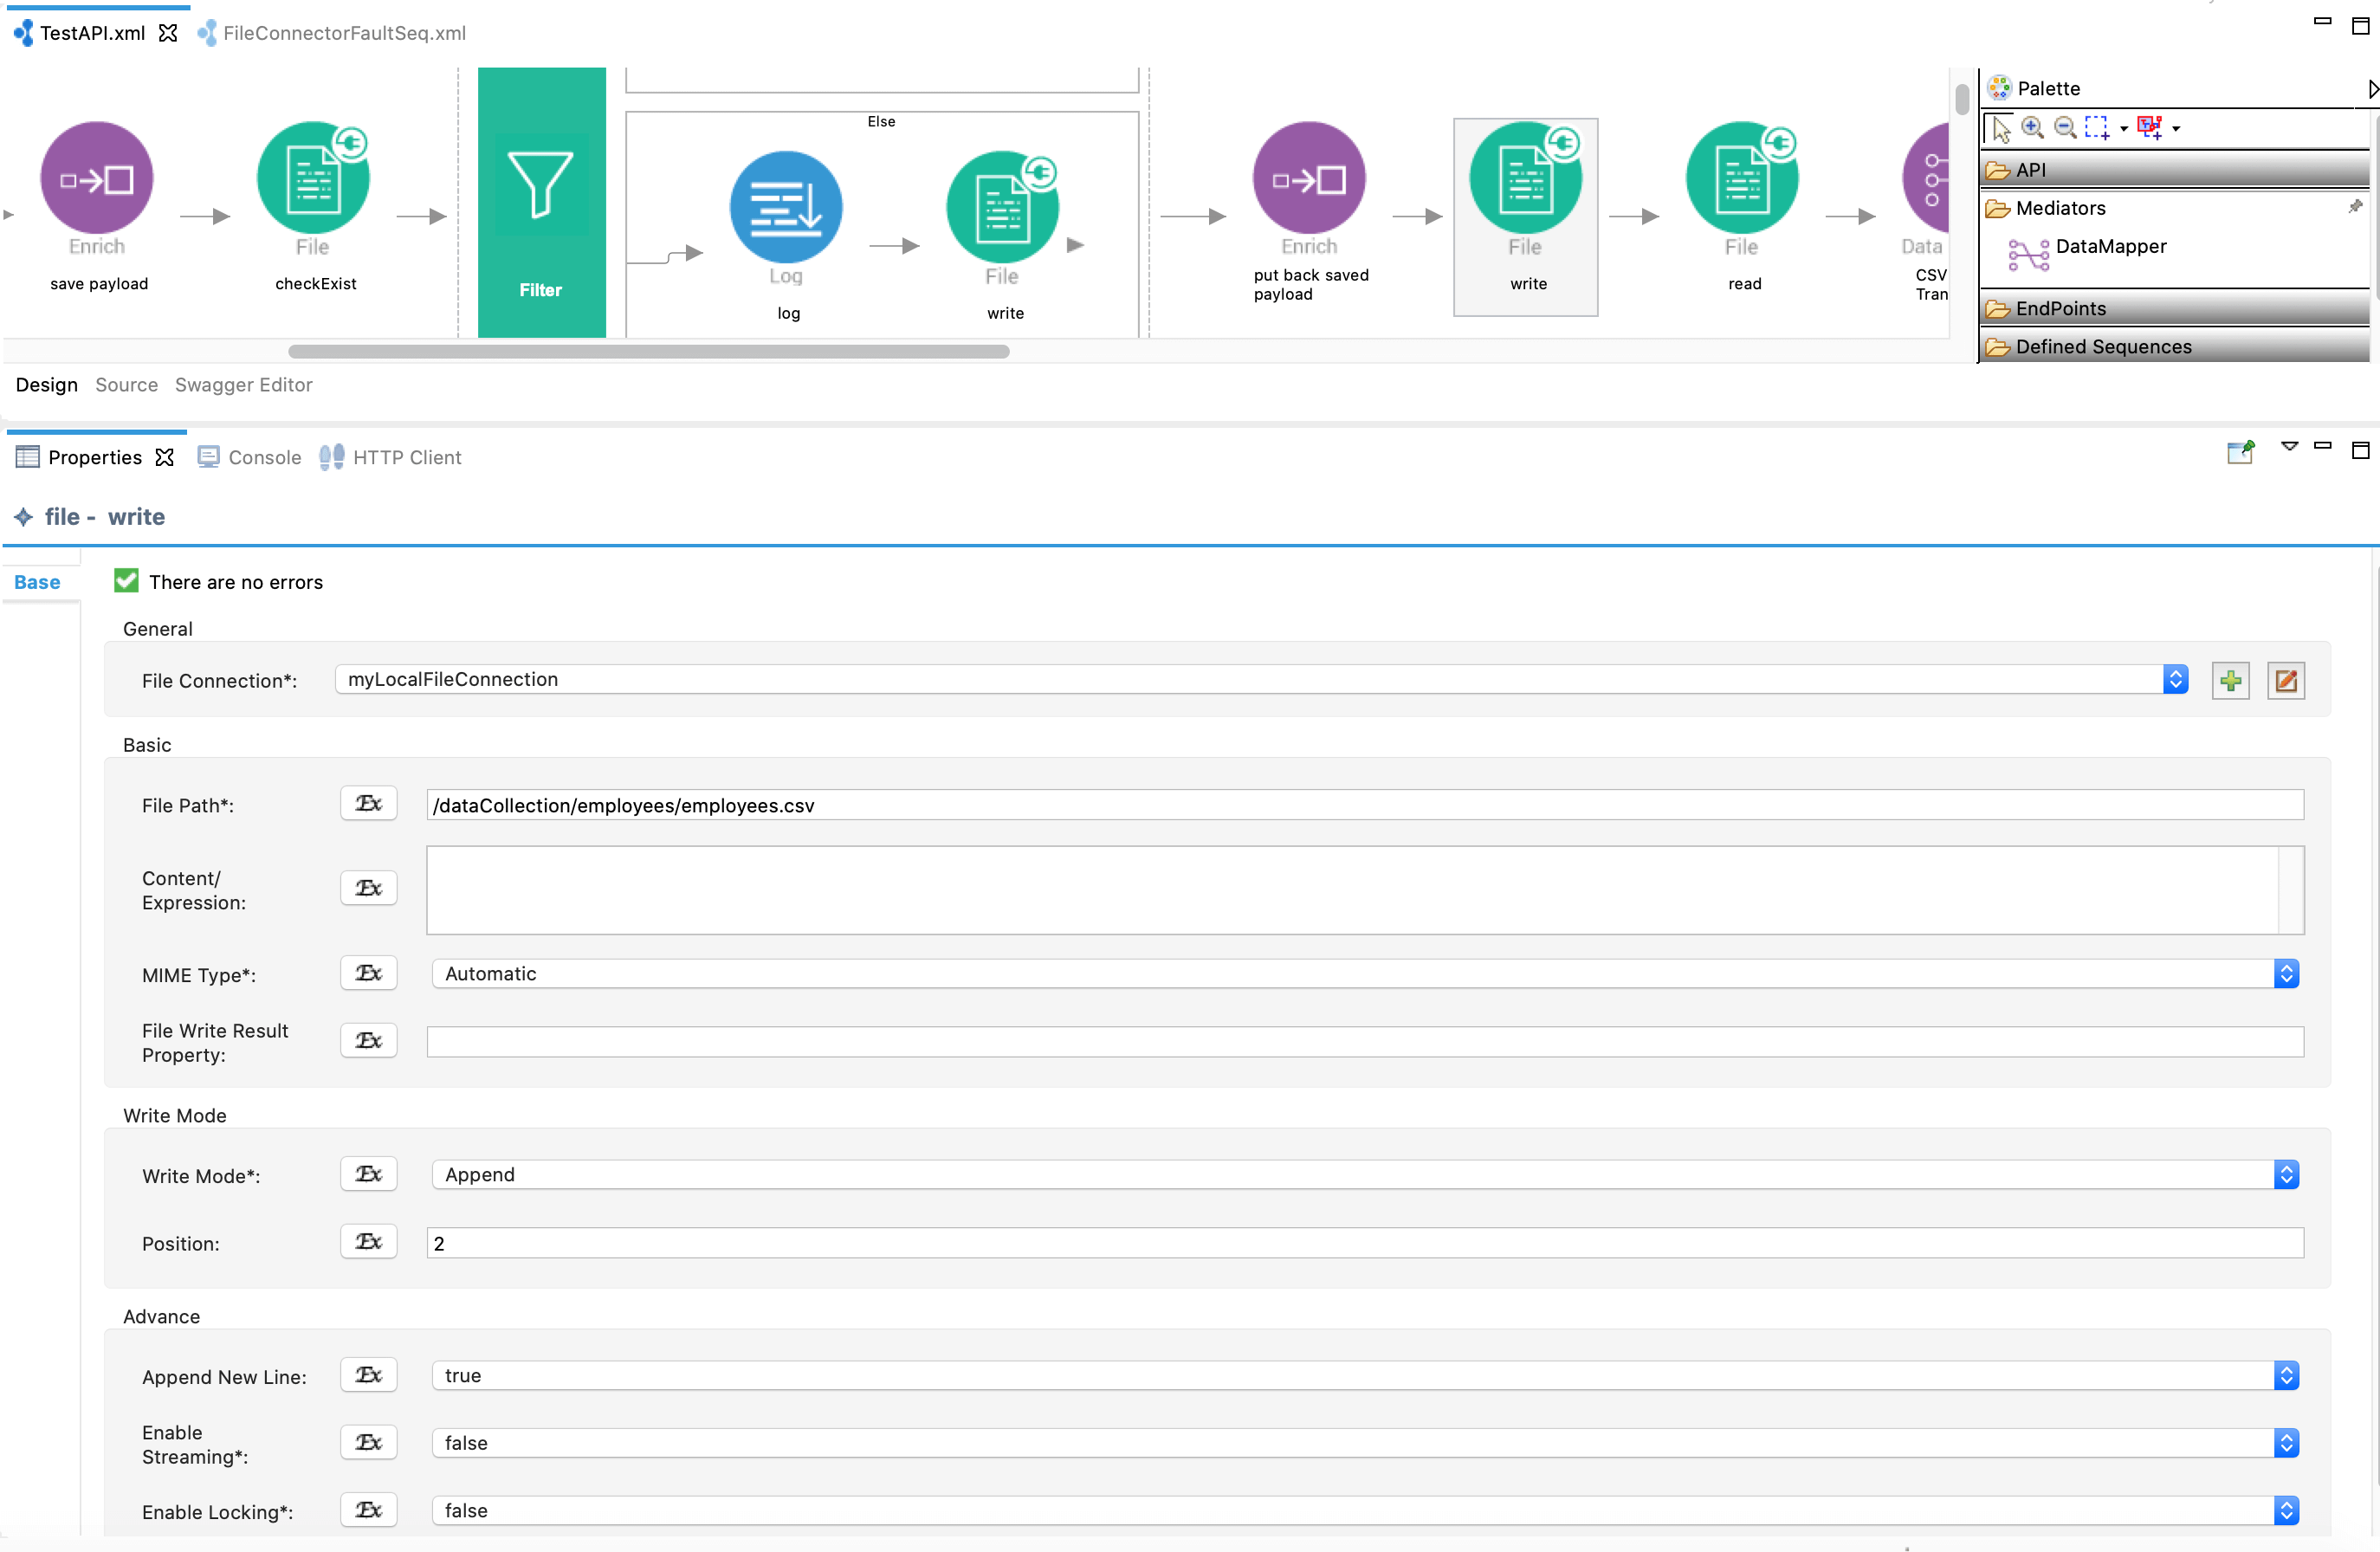
Add the File connector’s write operation again and configure it to append the CSV message to the existing file. The Write Mode needs to be 'Append'.
Note
As we need the newest message on the top, always append to line number 2.
-
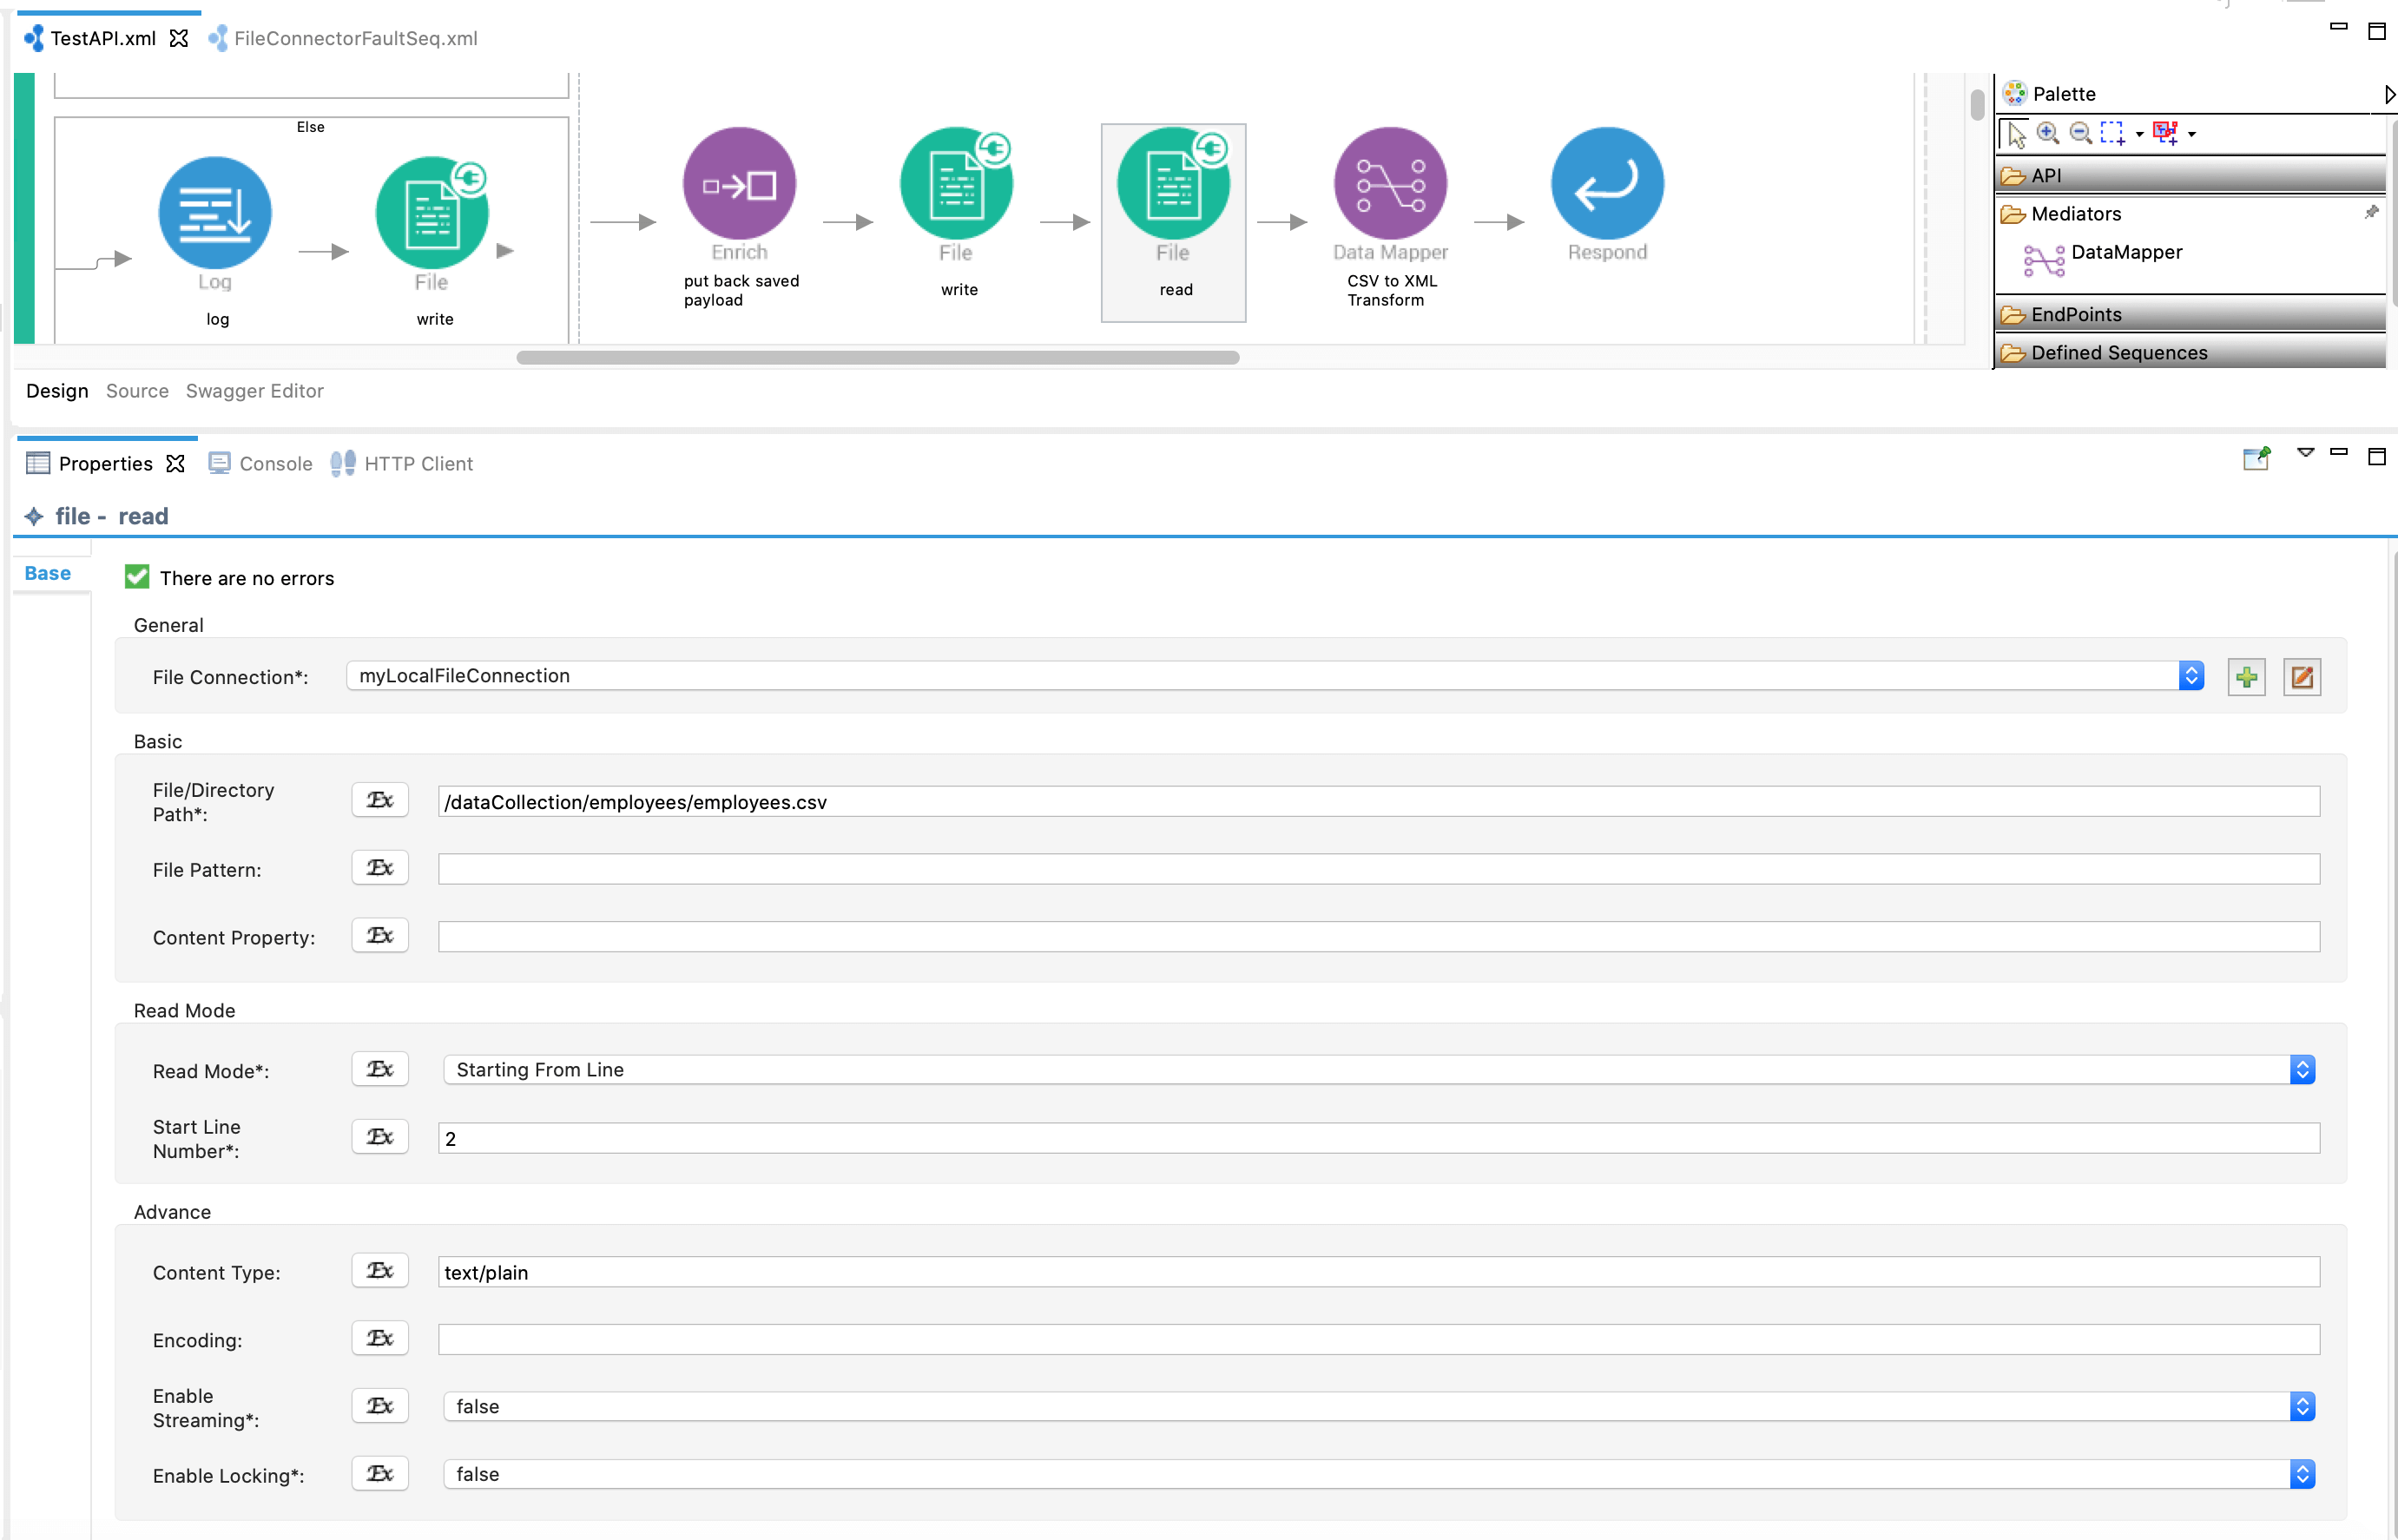
Add the File connector’s read operation and configure it to read the same CSV file.
Note
The file reading will start from line number 2. The content is read as a text message.
-
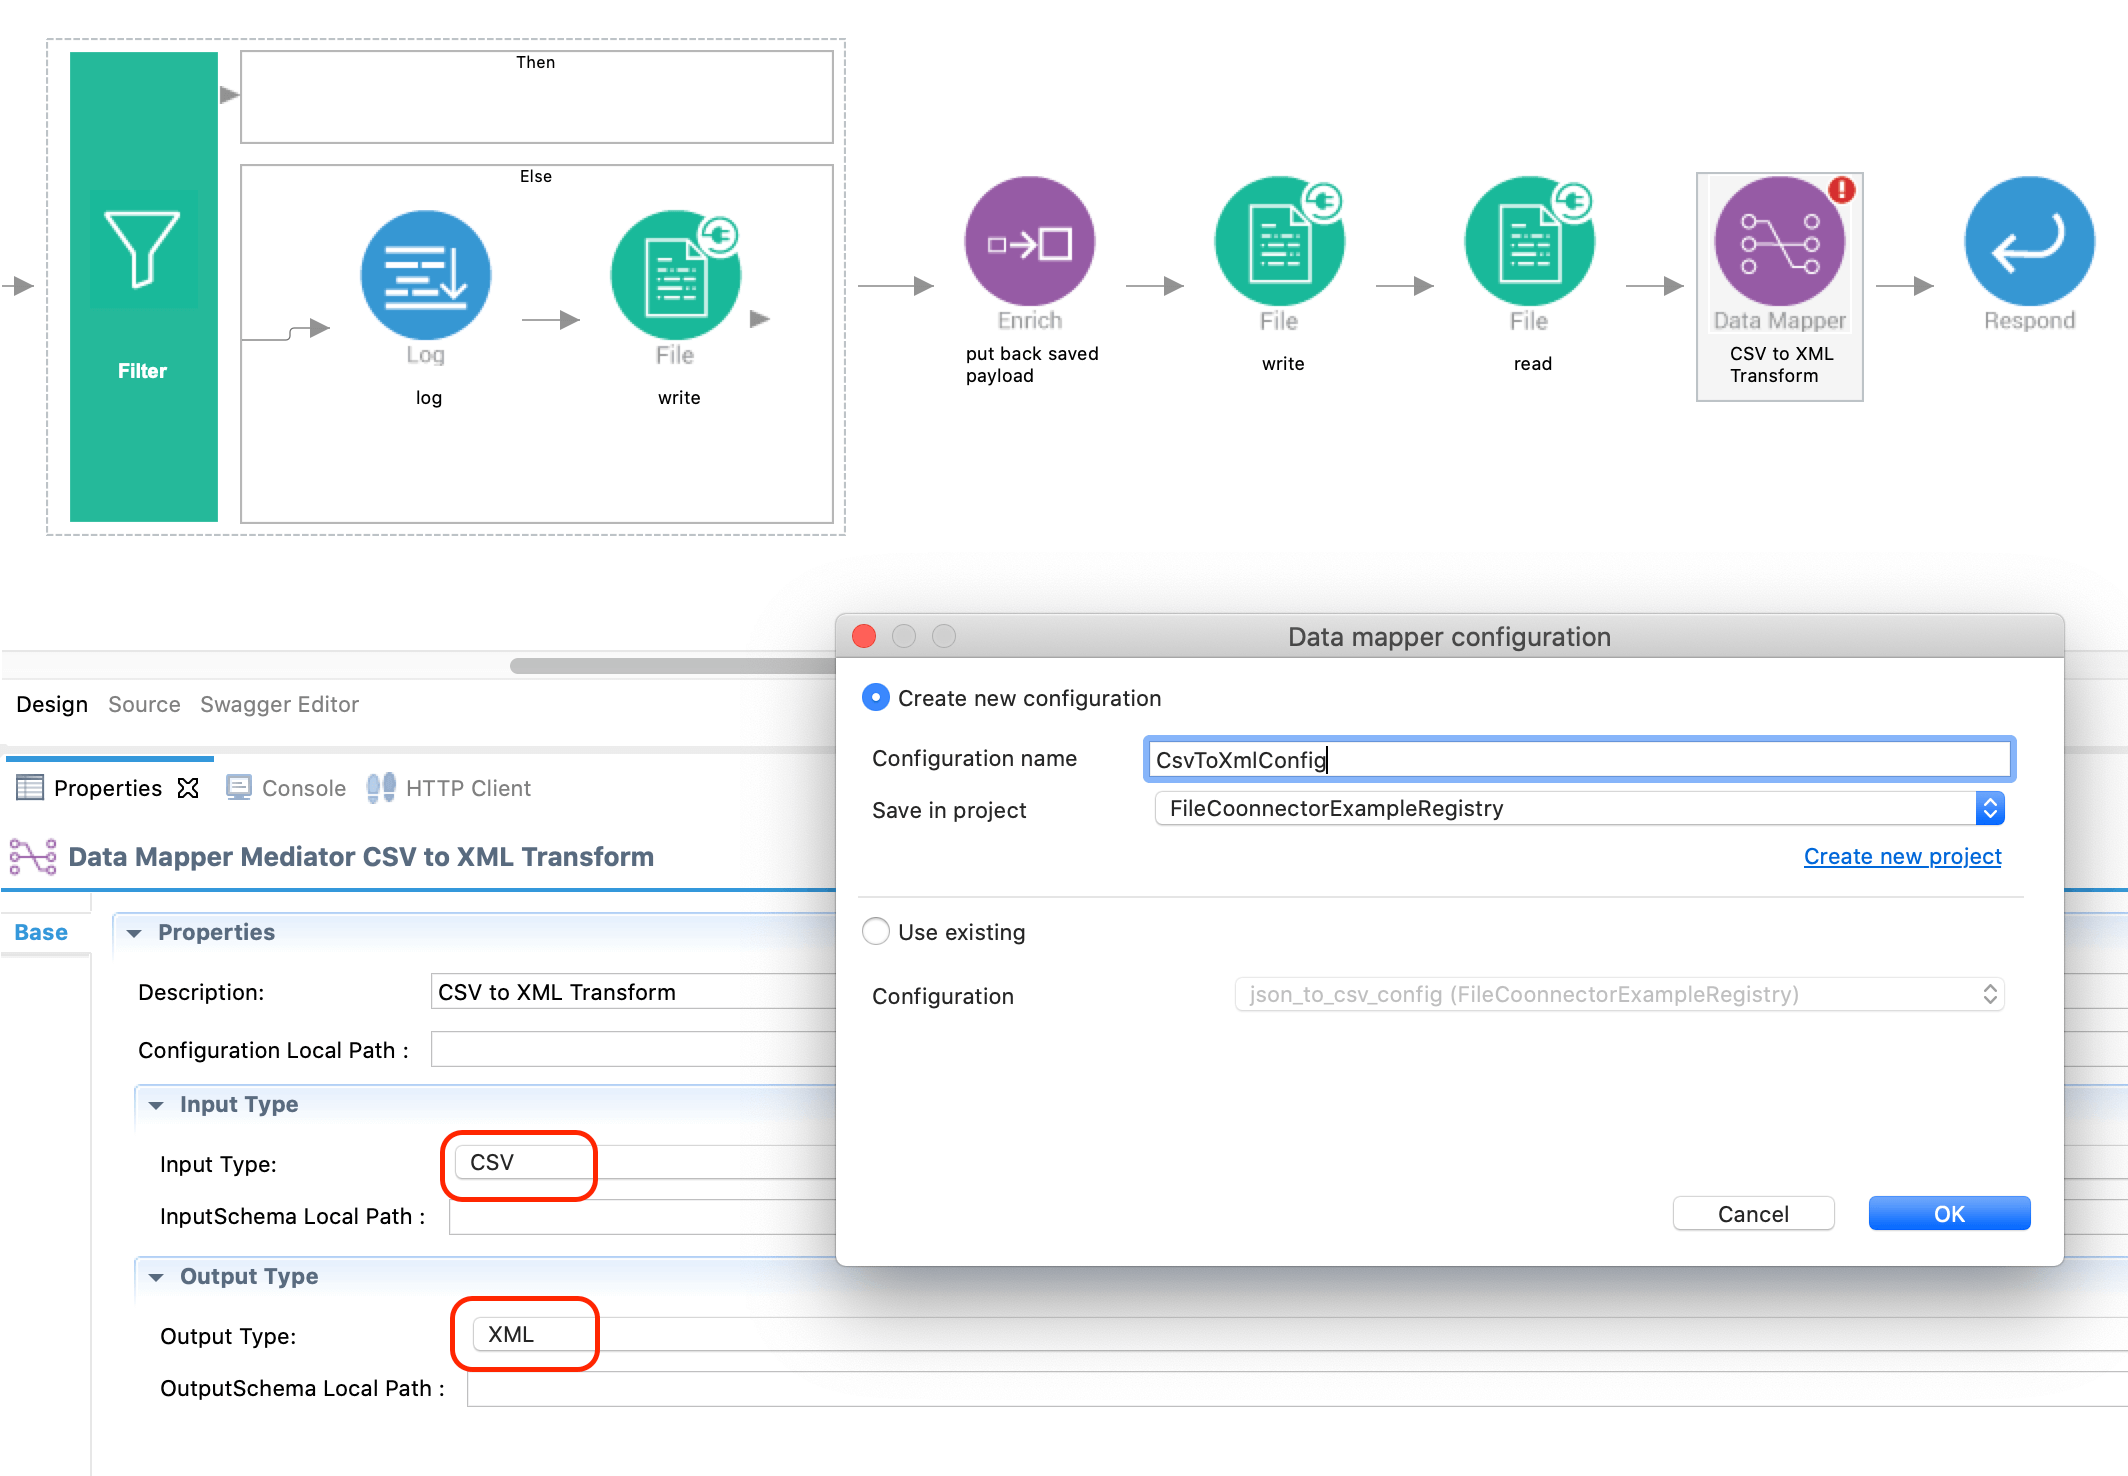
Add the Datamapper mediator again and configure it to convert the CSV message (after reading) back to XML.
-
Double-click the data mapper and add a new configuration called 'csvToXml'.
-
This time, the mapping should be from CSV to XML.

-
-
Finally, use the Respond mediator to send the transformed message to the API caller.
-
Now, let's configure a fault sequence to generate an error message when an error occurs in the message flow.
-
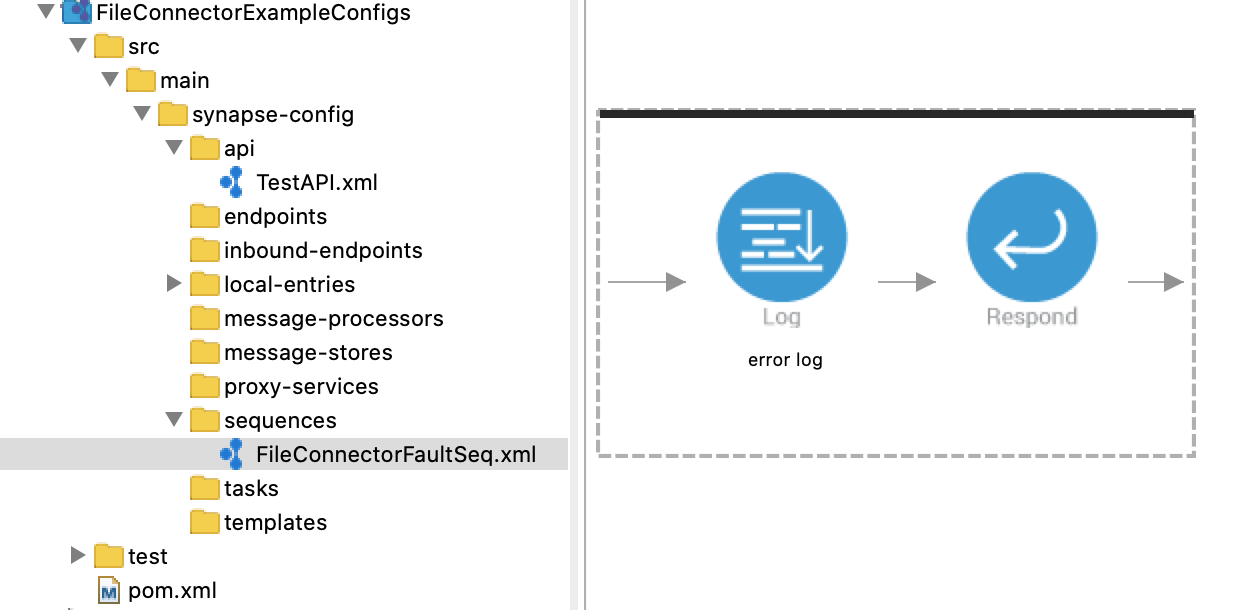
Create a fault sequence with a Log mediator and Respond mediator.
-
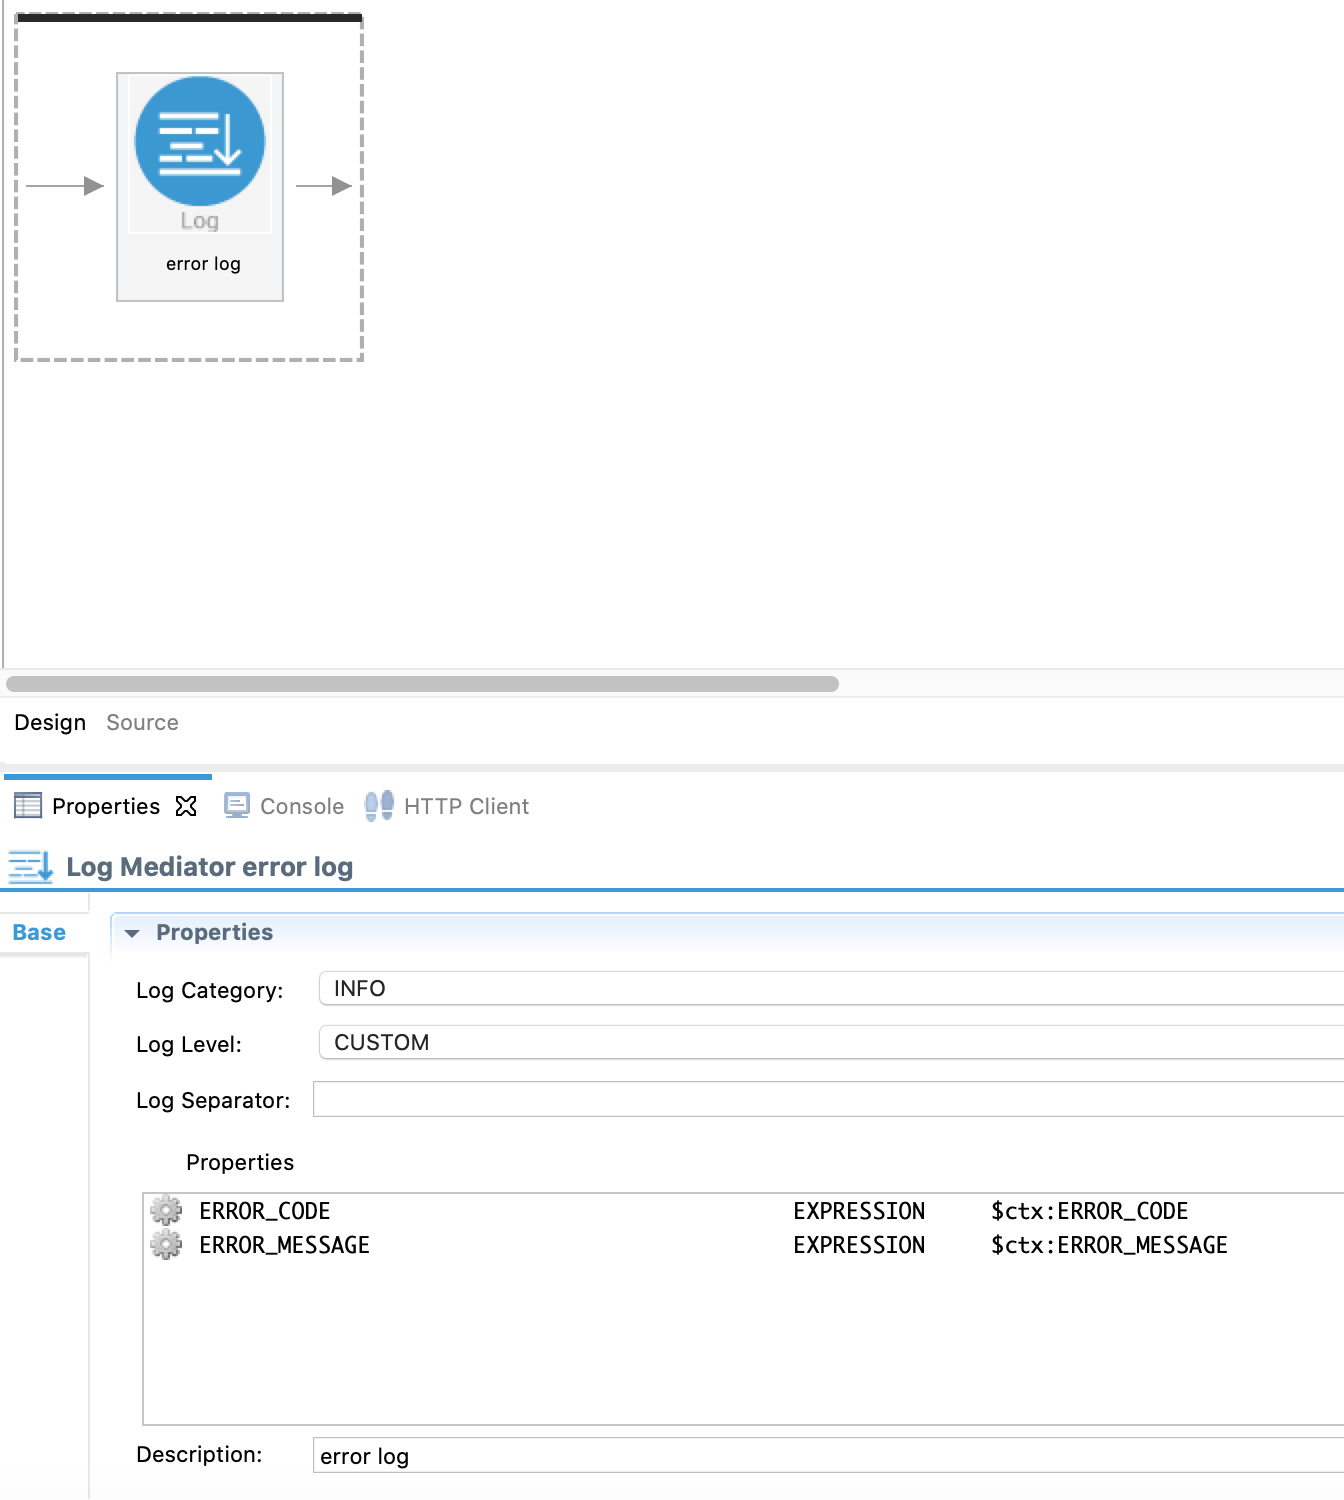
Configure the Log mediator generate a custom error.
-
Add the fault sequence to the API resource as its fault sequence.
-
Exporting Integration Logic as a CApp
CApp (Carbon Application) is the deployable artifact on the integration runtime. Let us see how we can export integration logic we developed into a CApp along with the connector.
Creating Connector Exporter Project
To bundle a Connector into a CApp, a Connector Exporter Project is required.
-
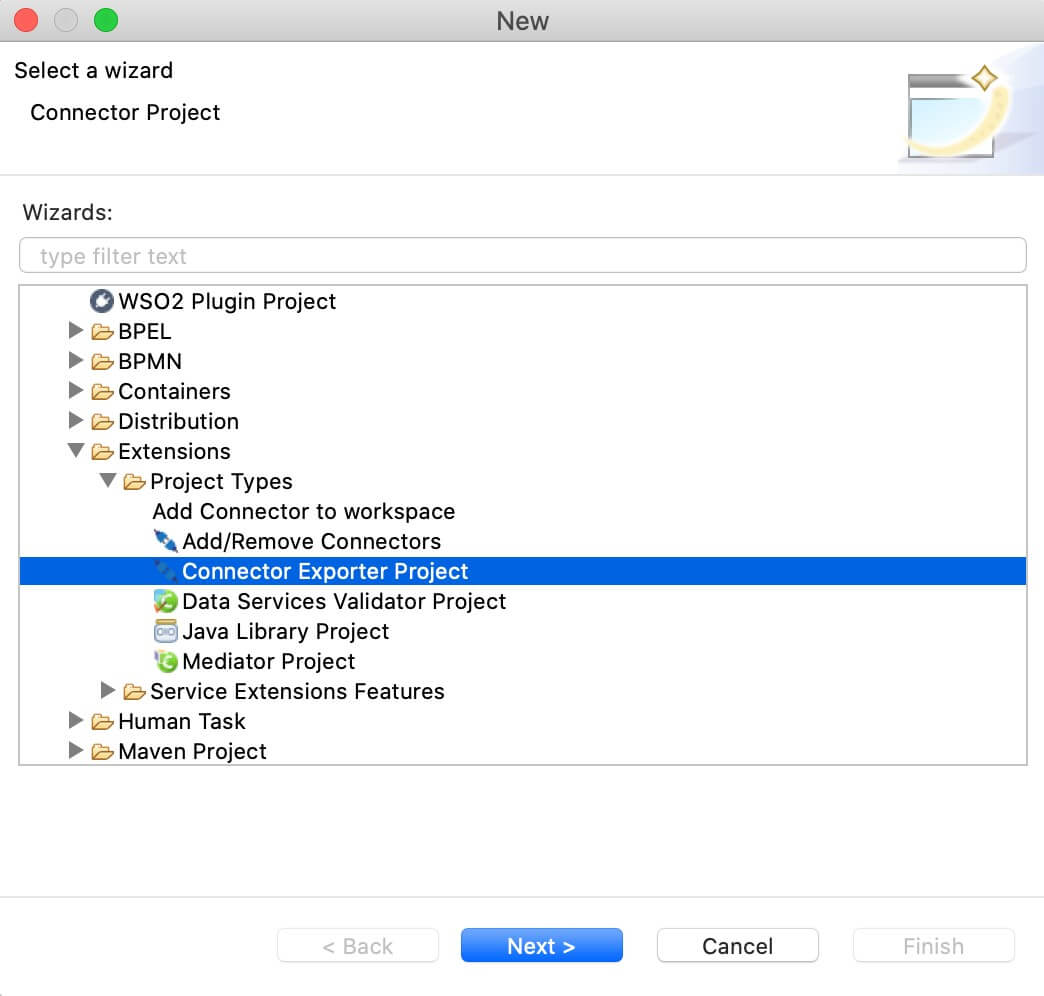
Navigate to File -> New -> Other -> WSO2 -> Extensions -> Project Types -> Connector Exporter Project.
-
Enter a name for the Connector Exporter Project.
-
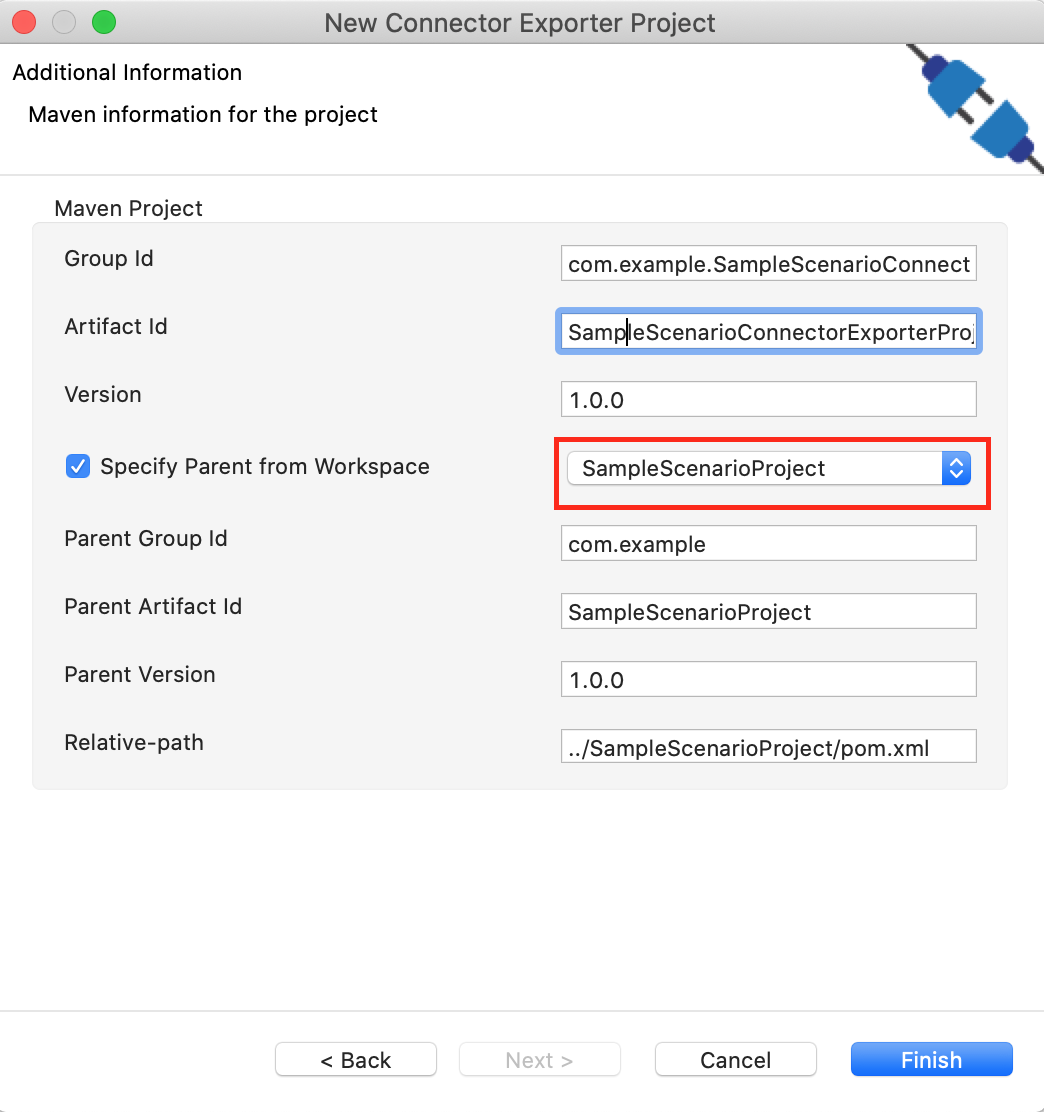
In the next screen select, Specify the parent from workspace and select the specific Integration Project you created from the dropdown.
-
Now you need to add the Connector to Connector Exporter Project that you just created. Right-click the Connector Exporter Project and select, New -> Add Remove Connectors -> Add Connector -> Add from Workspace -> Connector
-
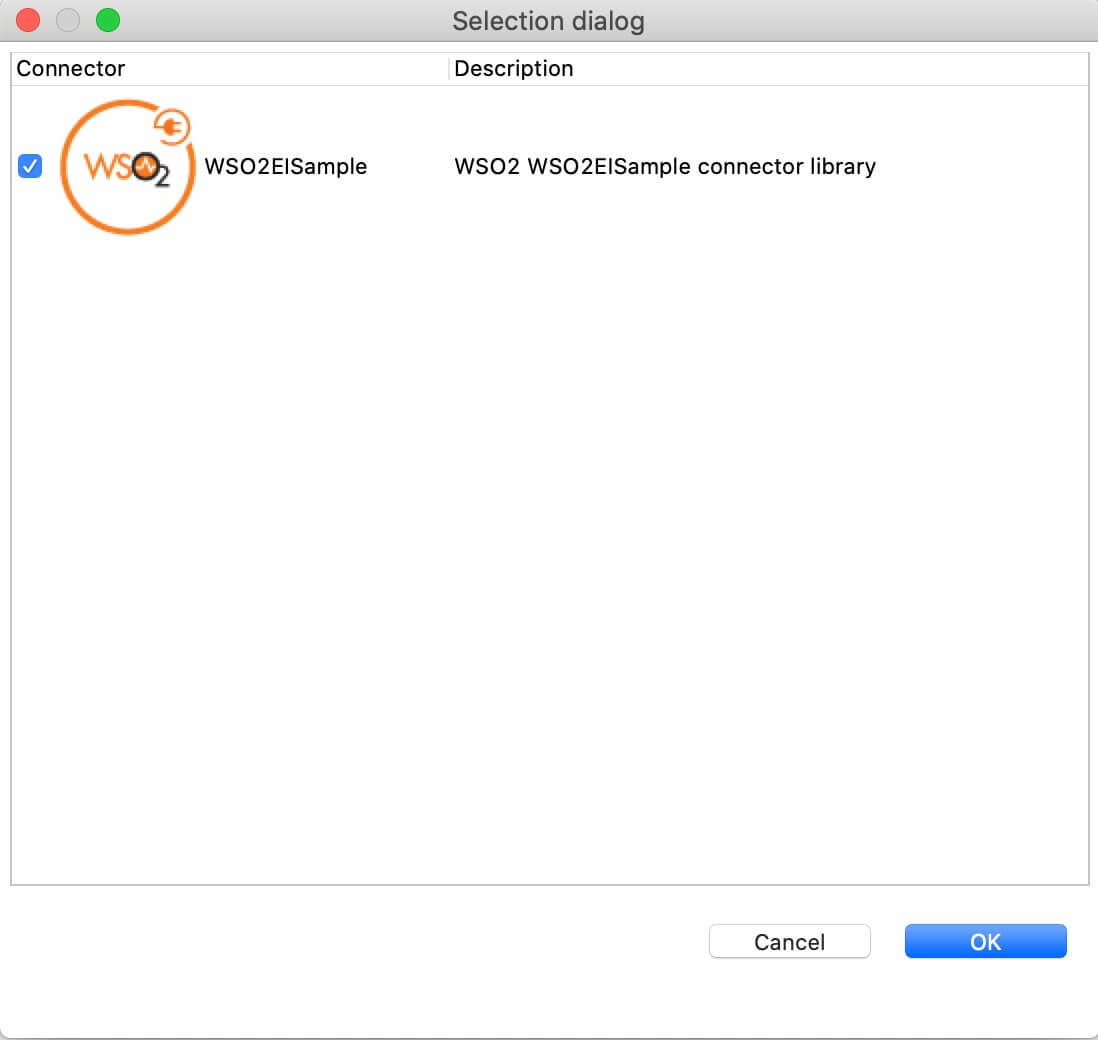
Once you are directed to the workspace, it displays all the connectors that exist in the workspace. You can select the relevant connector and click Ok.
Creating a Composite Application Project
To export the Integration Project as a CApp, a Composite Application Project needs to be created. Usually, when an Integration project is created, this project can be created as part of that project by Integration Studio. If not, you can specifically create it by navigating to File -> New -> Other -> WSO2 -> Distribution -> Composite Application Project.
Exporting the Composite Application Project
-
Right-click the Composite Application Project and click Export Composite Application Project.

-
Select an Export Destination where you want to save the .car file.
-
In the next Create a deployable CAR file screen, select both the created Integration Project and the Connector Exporter Project to save and click Finish. The CApp is created at the specified location provided at the previous step.
Deployment
Follow these steps to deploy the exported CApp in the integration runtime.
Deploying on Micro Integrator
You can copy the composite application to the <PRODUCT-HOME>/repository/deployment/server/carbonapps folder and start the server. Micro Integrator will be started and the composite application will be deployed.
You can further refer the application deployed through the CLI tool. See the instructions on managing integrations from the CLI.
Click here for instructions on deploying on ESB Enterprise Integrator 6
You can copy the composite application to the
<PRODUCT-HOME>/repository/deployment/server/carbonappsfolder and start the server.ESB EI server starts and you can login to the Management Console https://localhost:9443/carbon/ URL. Provide login credentials. The default credentials will be admin/admin.
You can see that the API is deployed under the API section.
Testing
-
Create a file called data.json with the following payload.
Note
When you configuring this
sourceparameter in the Windows operating system, set this property as<source>C:\\Users\Name\Desktop\Salesforcebulk-connector\create.txt</source>.<test> <information> <people> <person> <name>Hasitha</name> <age>34</age> <company>wso2</company> </person> <person> <name>Johan</name> <age>32</age> <company>IBM</company> </person> <person> <name>Bob</name> <age>30</age> <company>Oracle</company> </person> <person> <name>Alice</name> <age>28</age> <company>Microsoft</company> </person> <person> <name>Anne</name> <age>30</age> <company>Google</company> </person> </people> </information> </test> -
Invoke the API as shown below using the curl command.
Info
Curl Application can be downloaded from here.
curl -H "Content-Type: application/xml" --request POST --data @body.json http://10.100.5.136:8290/fileconnector/create -
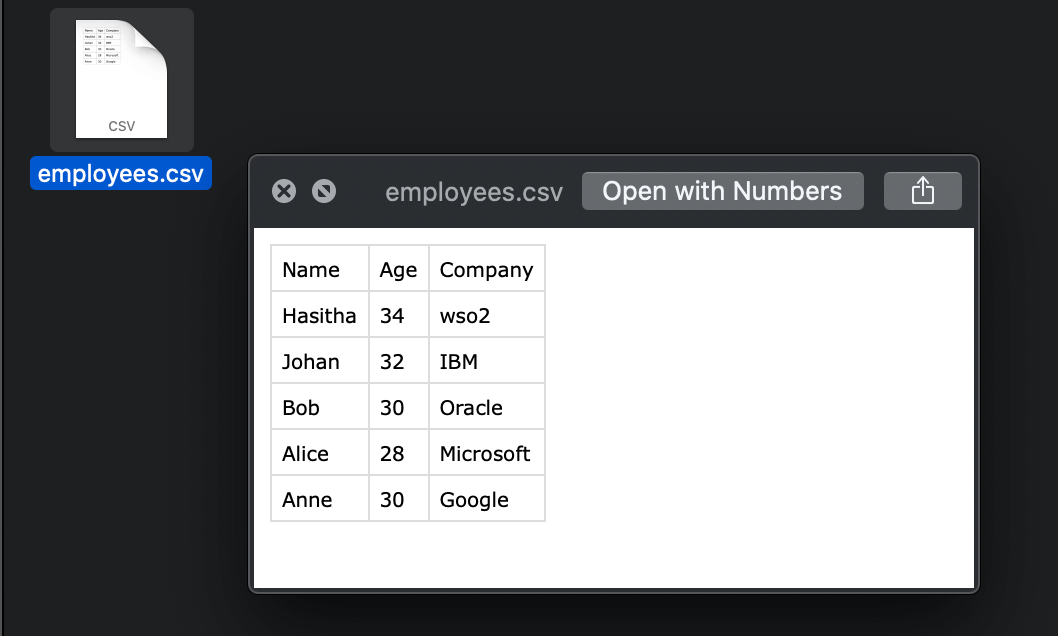
Check the file system to verify that the CSV file has been created.
-
If you invoke the API again with a different set of employees, the new employees will get appended to the same file. The response you receive will include all the employees that were added from both messages.
In this example, the File connector was used to create a file, write to a file, and to read a file. By blending these capabilities together with other powerful message manipulation features of MWARE ESB, it is possible to define a working scenario in minutes. The File connector has many more functionalities. Refer the File Connector reference guide for more information.
What's Next
- To customize this example for your own scenario, see File Connector Configuration documentation for all operation details of the connector.
